Capturing the Solar Eclipse
Learn how I planned my composition and took all the photos to create a composite eclipse image.
Annette Jones
4/10/20249 min read


A once in a lifetime event: not just a total eclipse, but a total eclipse in my hometown! What an exciting opportunity to photograph. This was my first attempt ever shooting any eclipse, and first time making a composite image, so it required a lot of studying and planning to make sure I was able to achieve the end result I envisioned.
Planning the Composition
My first step was determining when and where will the sun be when totality occurs at my location. I knew of course I intended to be in my hometown. I had in mind to shoot the county courthouse in the foreground; it is the most recognizable building in the area.
My next step was to go to my favorite photo planning app, PhotoPills. There are many tutorials available on how to use PhotoPills, and a complete discourse on how to use it is beyond the scope of this blog post, but I will detail some of the key elements related to eclipse planning.
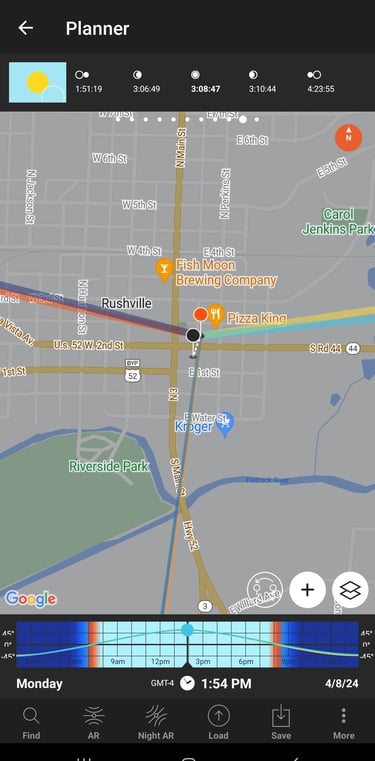
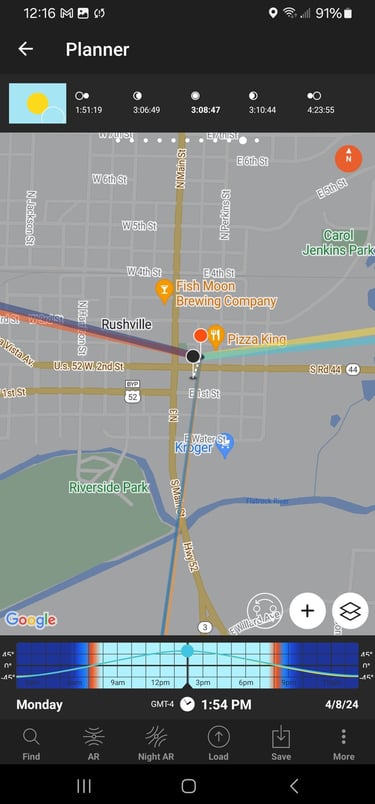
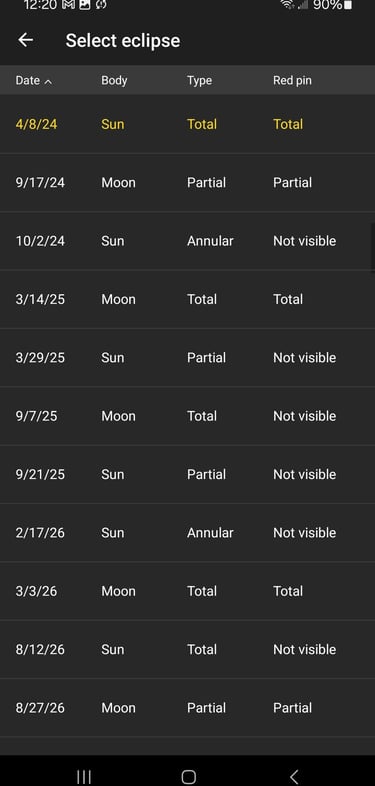
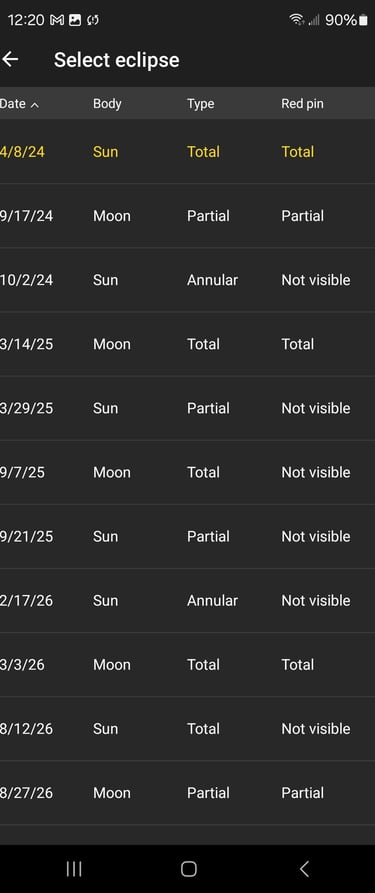
In the Planner section of PhotoPills, I went to the Map Settings icon. Within Map Settings, I loaded the Eclipse for 4/8/2024. You can select any of the upcoming eclipses, and it will load the data to determine exactly when for wherever you are that totality will occur.
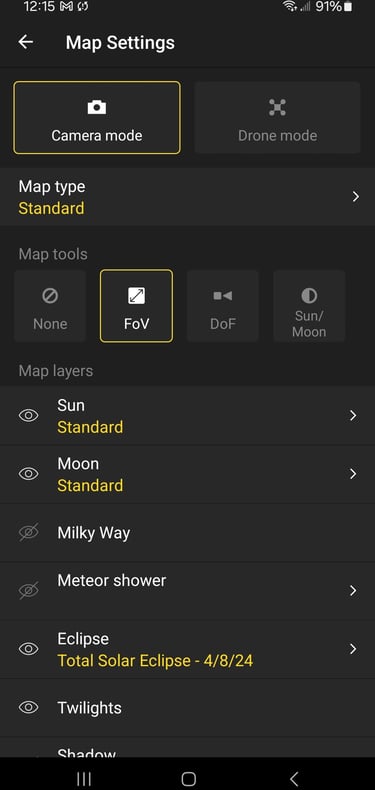
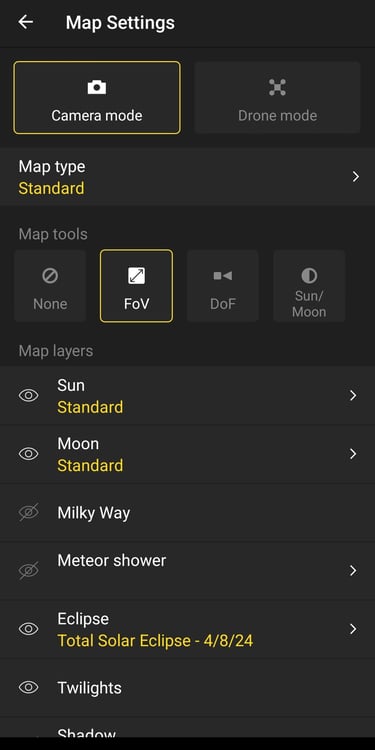
Map Settings
Eclipse Layers
Select Eclipse
After loading the eclipse, I can go back to the planner main screen and see when the eclipse will be for my location. I make sure my location is loaded, then I scroll through the panels at the top of the screen to see the timing for the eclipse.
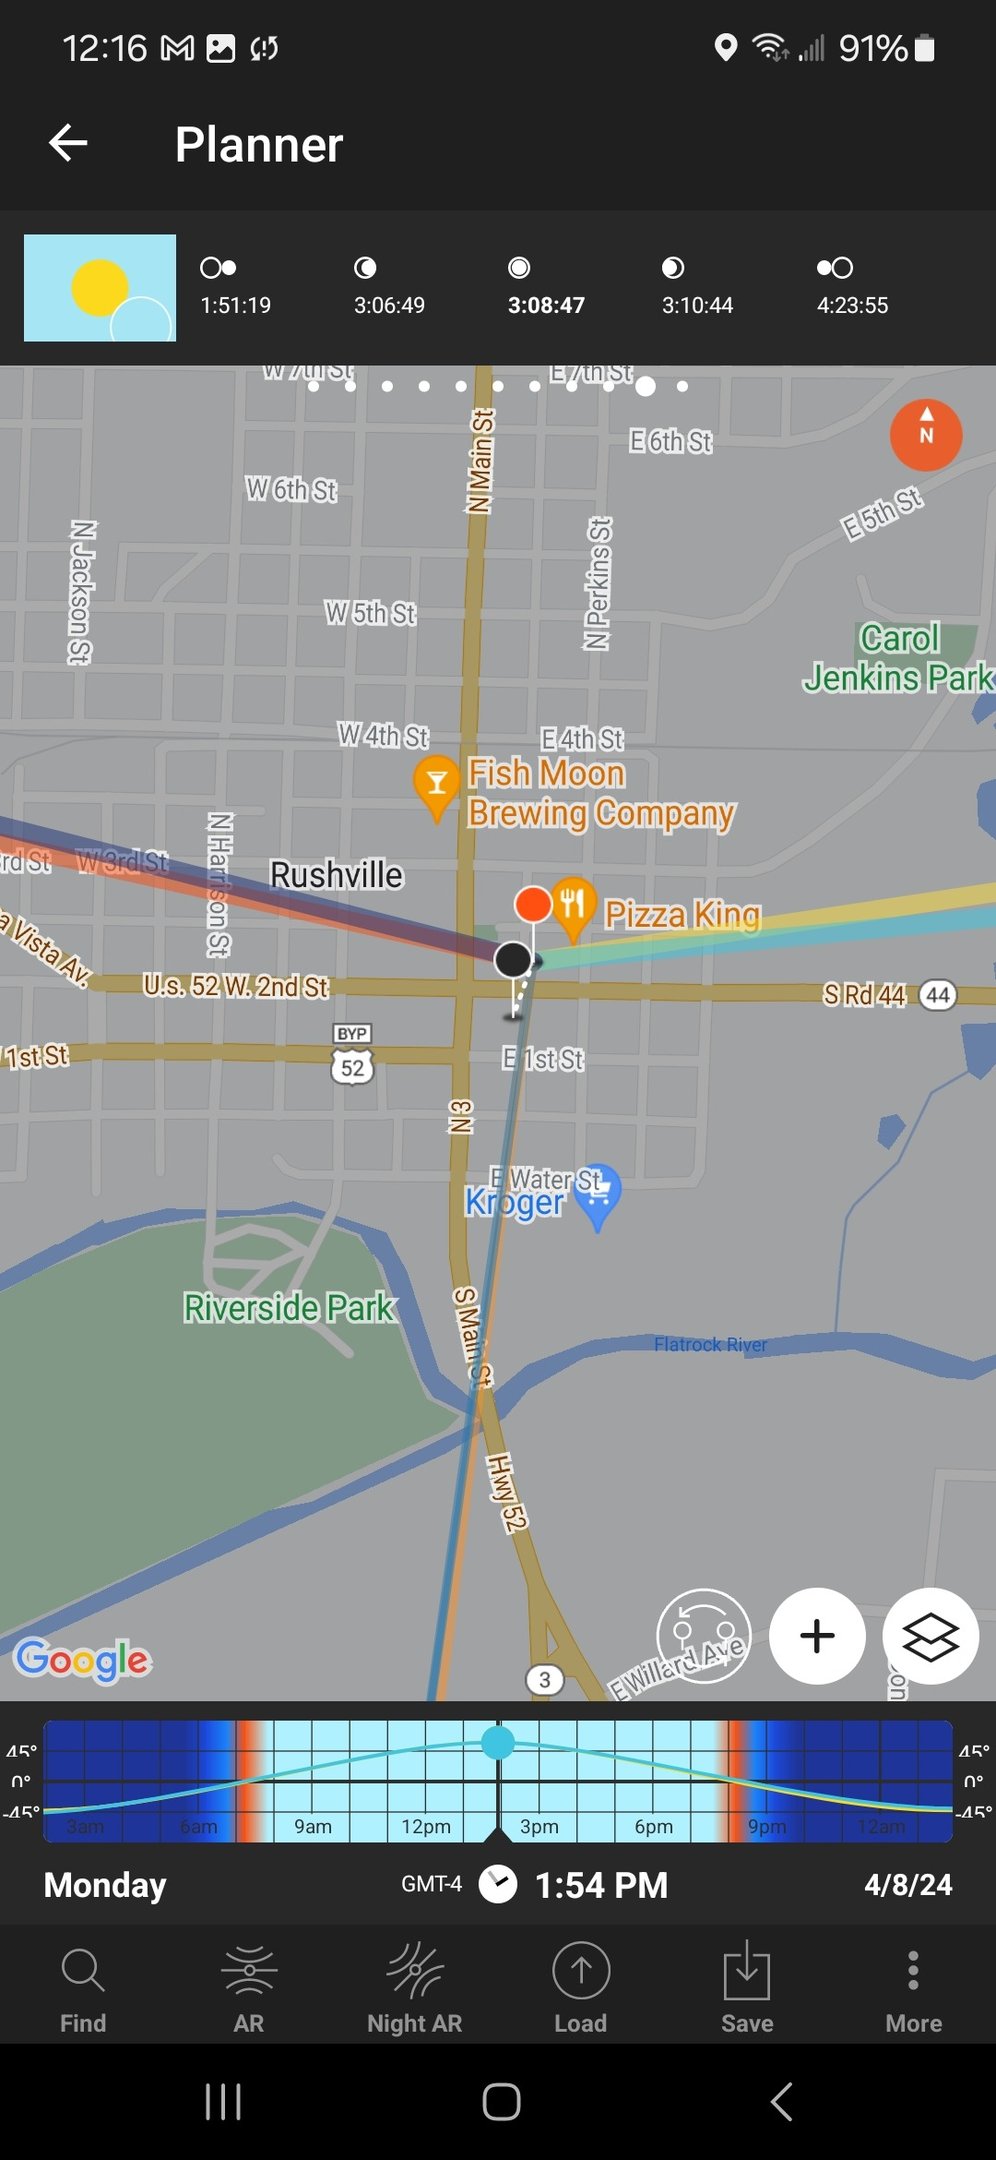
Eclipse timing
The times show, from left to right, first contact, second contact, totality, third contact, and end of the eclipse. I knew from these times (3 PM) that the eclipse was going to be really high up in the sky. From here I tried to determine, what kind of shot can I get? The most epic shot in my mind would be getting an alignment with a tall building or peak, and getting a HUGE eclipse/sun. This is done by using the compression effect: get really far away from your subject/building to make it look small, then zoom in with a telephoto to make the sun appear large. But is it possible?
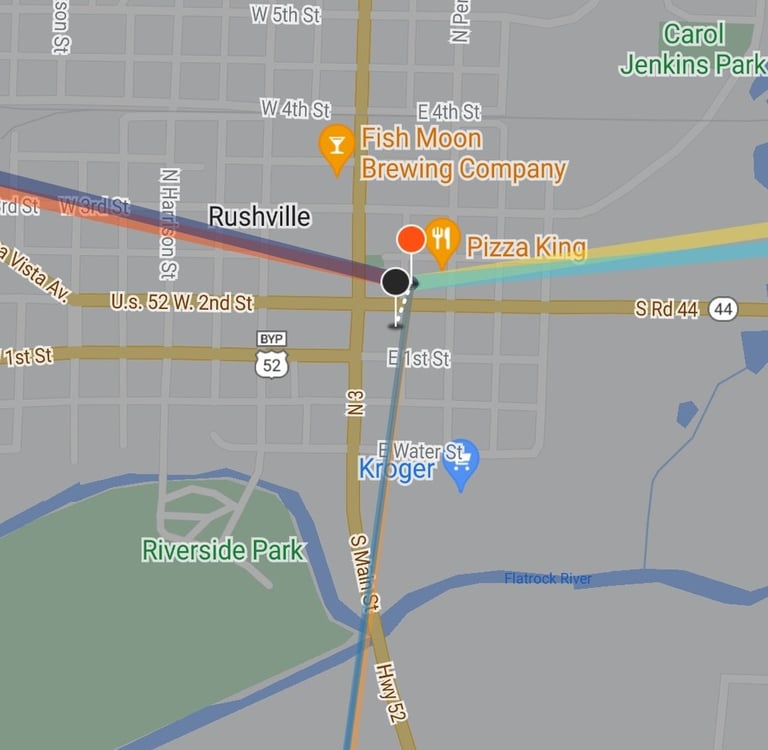
As I mentioned, the sun is really high up there at 3 PM! I knew the tower of the courthouse was 196 ft tall. I wanted to see, how close would I need to be to align the eclipse with the top of the courthouse? The answer was, basically right across the street looking steeply up at the tower. This is no good for creating the compression effect; when you are that close, the sun will look super tiny compared to the subject (only 2 ft)! PhotoPills can tell you all this information if you put the red pin on your location, and the black pin on the location of your subject (the courthouse).
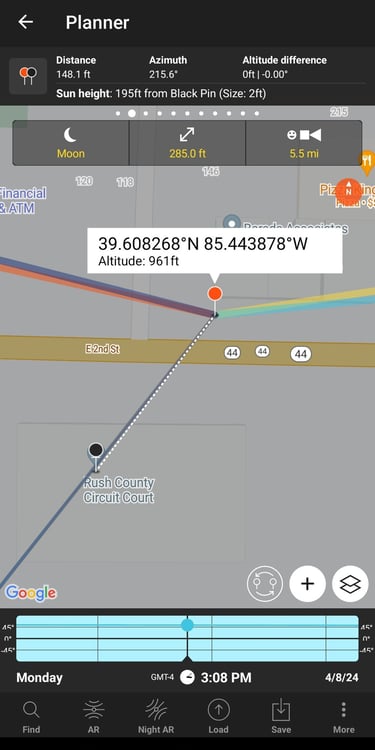
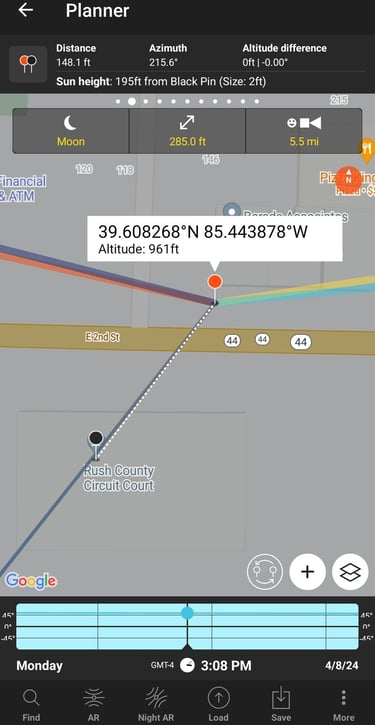
Sun height and size
Camera position
Courthouse Position
Bummer. So what are the other compositional options?
Telephoto closeup of totality, with no foreground
Wide angle shot with foreground, with a very tiny sun and a lot of blank sky in between
A composite image, combining both telephoto images and a wide angle shot of the foreground.
I chose option 3, as I felt this would best represent the experience of viewing the eclipse in my hometown. Telephoto shots of the eclipse corona (option 1) are amazing on their own, but they are pretty much the same no matter where you view it from; there is no reference to place from which it is viewed. A wide angle shot (option 2) would capture the place and the eclipse, but you lose the wonder of seeing the the detail of the eclipse, and probably lose the impact of place as well, as you will be seeing mostly just sky in between. This is how I decided my composition would be option 3, in order to fully represent the entire experience of viewing the eclipse, in my hometown, in a single image.
Gear
So now we have a concept. What else do we need to prepare? I knew for this shot I would need two cameras: one for a wide angle shot of the foreground, and one for the telephoto shots of the sun. I used my Sony A7RIII, A7RV, Sony 16-35 mm wide angle lens, and Sony 200-600 mm telephoto lens.
Two cameras mean two tripods. I have a lighter travel tripod I used for the wide angle, and my heavier monster tripod for the telephoto (added stability to reduce vibrations).
The most important new piece of gear you may need to photograph the sun is a solar filter. I used a Tiffen 18-stop solar ND filter from B&H. This is NOT the same as a normal ND filter. You want to make sure whatever filter you buy is specifically for solar photography. Do not just try to stack normal ND filters. Do NOT look at the sun through your viewfinder with a solar filter. *Disclaimer: you are responsible for you own safety and the safety of your equipment.
A shutter release cable is in order for your telephoto shots to minimize vibration.
And as always: memory cards! Changed batteries! Back-ups for all of those!
Settings
Some additional prework is required to determine what your settings need to be for the telephoto shots of the sun. It is going to be specific to your camera, lens, and solar filter, so don't count on just copying settings from someone else. We are going to do an experiment, varying the ISO, f-stop, and shutter speed to determine the best settings for day of the eclipse.
Take your camera and telephoto lens with solar filter out on a sunny day. Set it up on a tripod with a cable release as you would the day of the eclipse. Set your camera to manual mode and start with some initial settings, such as ISO 200, f/8, and 1/6400 s. Set the lens to manual focus. Then, looking at the LCD screen, adjust the focus ring to achieve focus. To do this, you can zoom in on the edge of the sun or some sun spots if you can find them. Never look directly at the sun or through the viewfinder.
The next step is to take a series of photos with varying ISO, f-stop and shutter speed. Here are the settings I tested:
ISO 200 and ISO 400
f/8 and f/11
1/6400 s, 1/3200 s, 1/1600 s, 1/800 s, and 1/400 s
After shooting all combinations of all these settings, download the pictures and evaluated them. I found that for my set up, the best exposures and sharpest images were at ISO 200, f/8, and 1/800 s. f/11 was not as sharp as f/8, and the other shutter speeds were not the right exposure or had a hint of blur at times (1/400 s). These will be your settings for the phases of the eclipse with the solar filter, before and after second and third contact, respectively.
What about the settings between 2nd and 3rd contact, including totality? Unfortunately, these cannot be practiced like the other phases. The most important thing to know is for these phases, you want to REMOVE the solar filter. You will also want to bracket exposures. With bracketing you can pull out more detail of the eclipse corona. Darker exposures will capture prominences very well; lighter exposures will capture more of the outer edges of the corona. My settings were ISO 200, f/6.3 (wide open for my lens), and 1/50-1/8000 s.
And last, the settings for the wide angle shot. This shot I wanted to take during totality, to capture the dark sky and 360 degree sunset-like conditions. I did bracketing for this shot as well, my best shots being at ISO 400, f/8, 1.6 s for the foreground, and 0.6 s for the sky.
Whew! That's a lot going on. How will we organize for the day of the event?
Write Down Your Timeline and Plan
This is very helpful to do, as totality comes and goes super fast, and the chances to capture Bailley's Beads and the diamond ring are just seconds. It is easy to get excited (even a little panicked) if you are flustered and fumbling for camera settings. It's very important to practice a LOT with your gear before the even be really comfortable with how to make adjustments fast.
Here is my example plan for the day of the event:
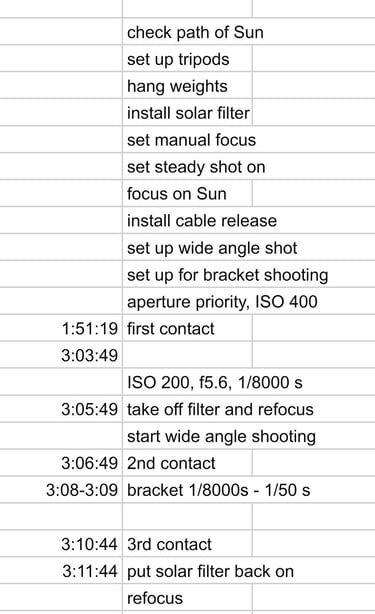
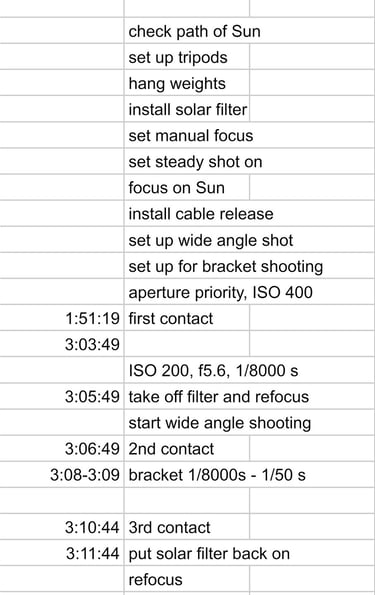
Tailor your plan to what makes sense for you and for your composition. The key things for me were to make sure I had everything set up and ready to go and not be scrambling. There is a lot of time between first contact and second, but between second and third it really flies by and it's important to be prepared.
Processing
So now the eclipse has come and gone and we have our photos. My first step was to import the photos into Lightroom and select the different photos I would use for my composite. I chose images to represent totality, first, second, and third contact, and some of the stages in between from my telephoto shots, and I chose the best exposures of the foreground with my wide angle shots. Then, after some minor adjustments in lightroom, I imported those images to Photoshop.
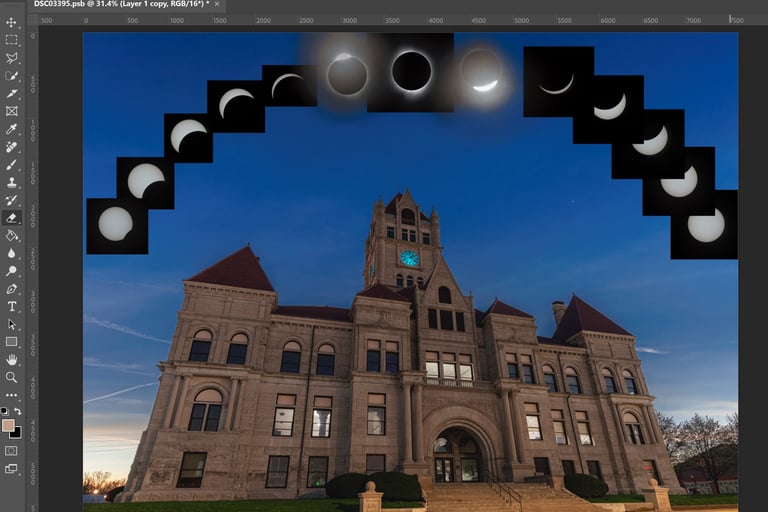
Here is an example of the different stages of work in Photoshop and how it progressed:
Stage 1: Foreground shot. I used two exposures of the foreground shot and blended them to get a nice exposure of the courthouse and of the sky. I placed the building exposure layer on top of the sky exposure layer, and then applied a mask to the sky of the building exposure layer. I also took the time to patch out the car parked on the right using the clone stamp tool.
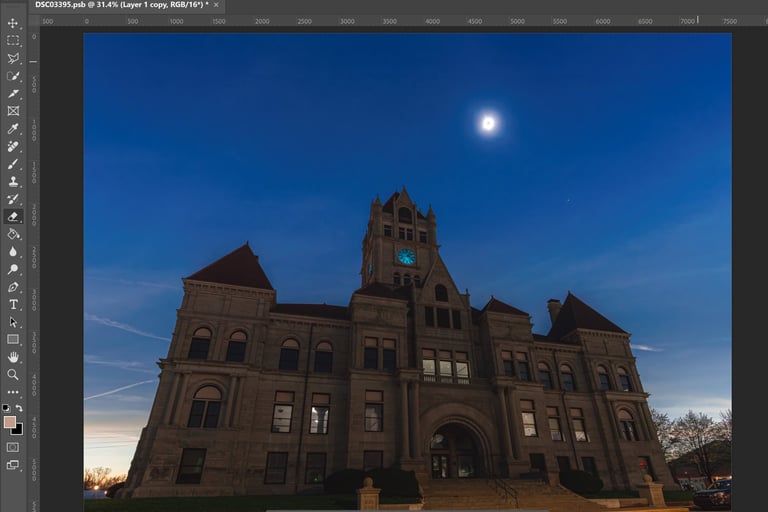
Foreground image: Sky exposure
Foreground image with building exposure layer
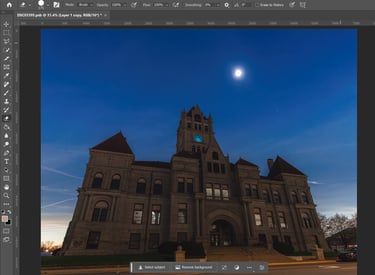
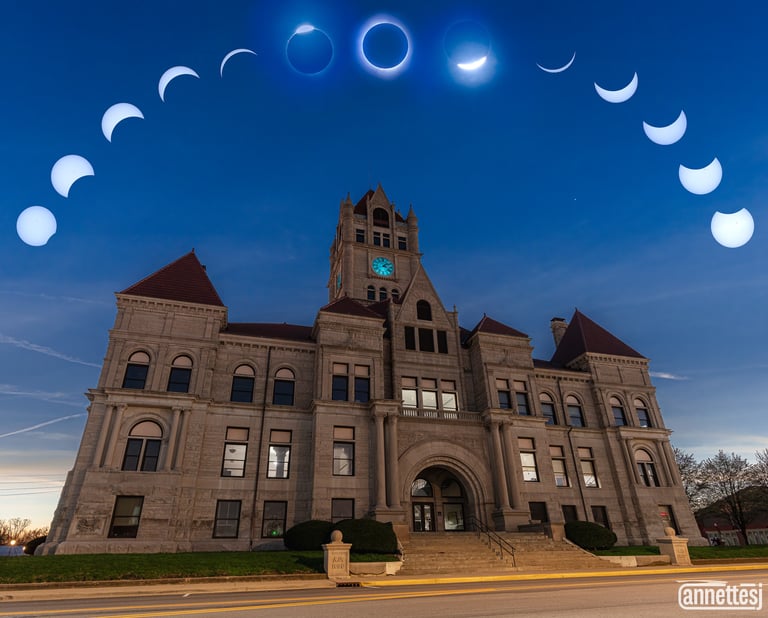
Stage 2: Adding in the telephoto sun images. Each image was placed as a layer on top of the foreground shot. I then needed to resize the sun images to fit the composition. Every image was shot at the same focal length to keep each sun the same relative size. I then grouped all these images into a folder and resized the folder as a group, using Edit>Transform>Scale, and then resizing them all by width and height percentage. Each image was placed to fit in the composition and move from east to west in order of eclipse stage progression.
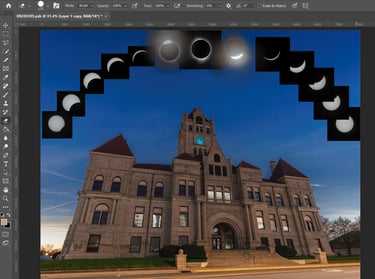
Telephoto sun images layered onto wide angle foreground images
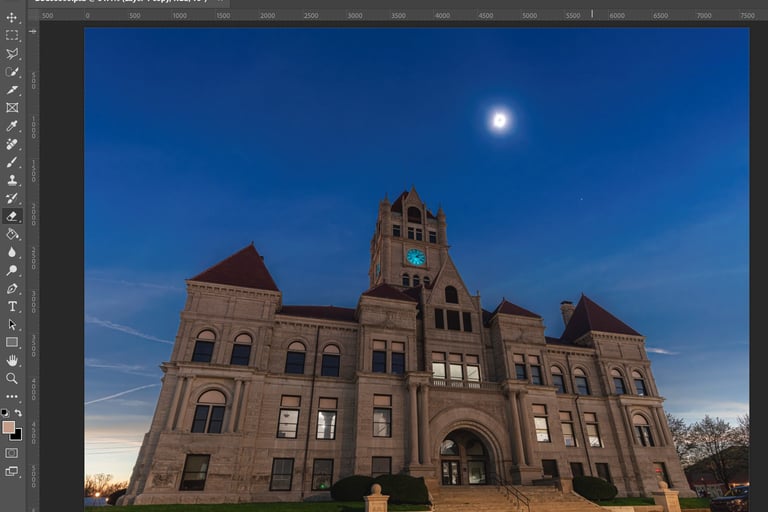
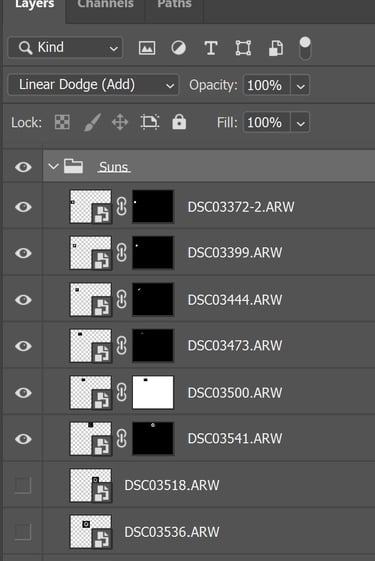
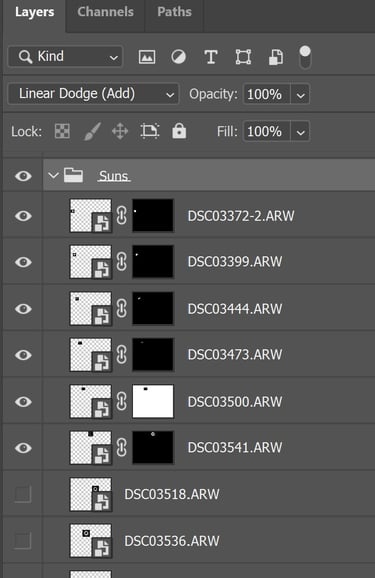
Stage 3: Formatting the sun images to fit the scene. To do this I applied a mask to each individual sun layer:
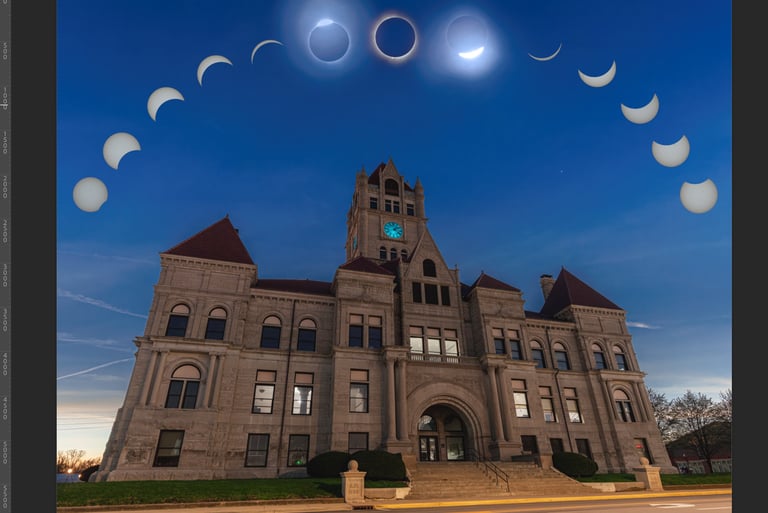
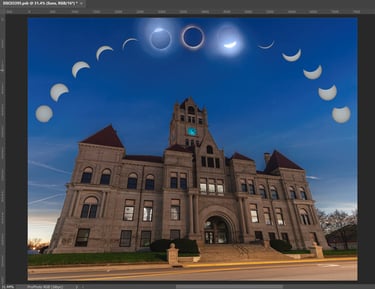
This is looking better but still does not match the color and tone of the wide angle shot. To correct this, I used Curve and Selective Color adjustment layers, and set the layer type to Linear Dodge.
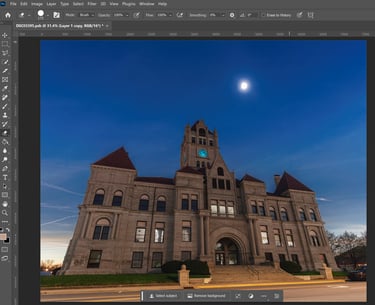
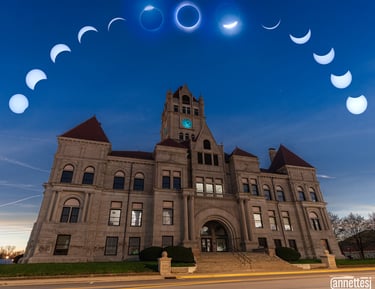
A now we have our final result:
Conclusion
This image is very special to me. The next total eclipse in the US will not happen for another 20 years. The odds of experiencing this eclipse not just in the US but my hometown are extremely rare. It rained (poured!) here the days before and after the eclipse. Such luck is amazing to me.
This image required by far more preparation and work than any other in my catalog. It takes skill not in just wielding a camera, but also skill in post-processing. Neither is a simple task.
What I love about this image is that it captures the essence of the experience far better than any single image could. I have never done a composite before, but this event really called for it. There is no harm in composites so long as they are declared as such. Just be up front about your work, and express your creativity.
Contacts
annette@annettesjphoto.com
Socials
Copyright © 2023-2025 Annette Stiers Jones Photography. All rights reserved.