Photographing the Aurora
The strongest solar storm in twenty years affords a rare opportunity to capture the aurora.
NIGHT PHOTOGRAPHYAURORA
Annette Jones
5/12/20245 min read
Photographing the aurora was on my must-do list, but I always thought I would have to travel to Alaska, Iceland, or Norway to see them. What luck to have a chance to see the aurora in my own state of Washington. A perfectly clear day made for the rare opportunity to see the results of the biggest solar storm in twenty years.
Location
Dark locations are best for viewing the aurora, so I ventured away from the city lights. This aurora was so bright, however, that even in the city it was visible and captured on camera.
There are many resources available for dark sky maps. They are worth referencing even if you think you know a dark location; you may be surprised.
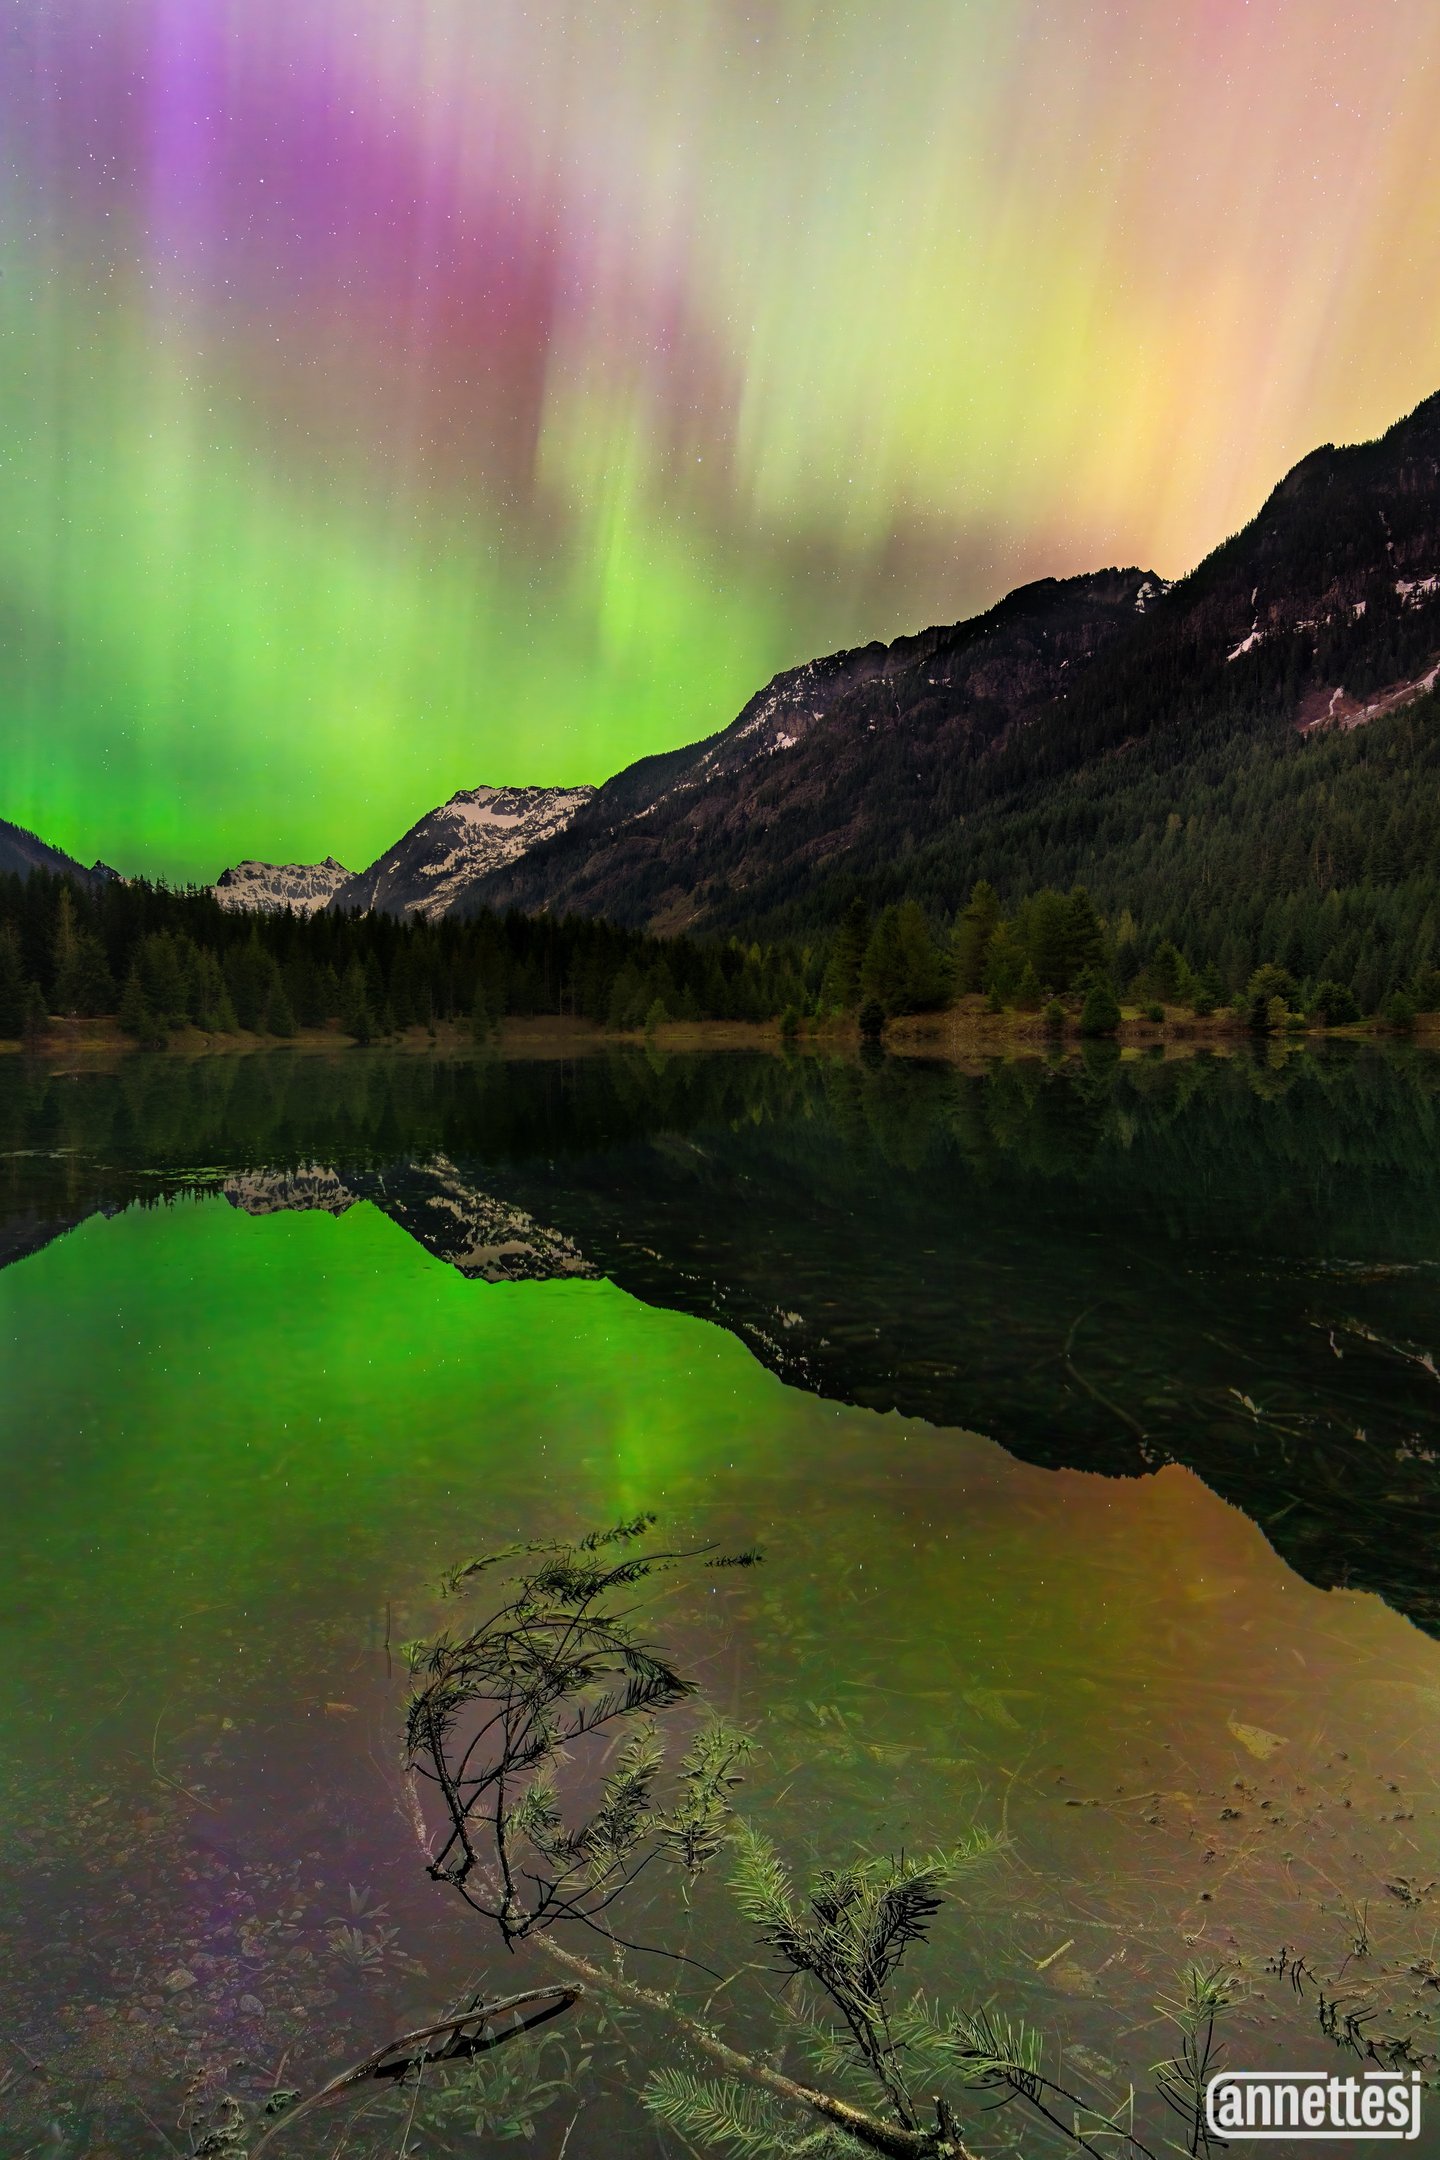
I chose Gold Creek Pond in Mount Baker-Snoqualmie National Forest. I liked this spot for a couple reasons. It is easy to get to, and a short walk in the dark. It also has a great backdrop of snow capped peaks and reflective water. Reflections are great; it's like getting two auroras for the price of one.
Weather
You don't need completely clear skies to get great photos, but less clouds certainly helps. I like to use the Ventusky app or the Clear Outside website. These are good references if it is uncertain where clouds will be or how much coverage to expect. This night was so clear, regular weather forecasts sufficed.
The other key forecast to check is the aurora forecast. This was one hard to miss as it was all over the news and the largest in years. One of the key metrics to reference is the Kp value. The scale is 0-9, and this one was an 8. People sometimes go aurora hunting at values of 4-5, but those typically are not so certain.
I like to reference the Aurora app. You can set a specific location, and it will alert you if conditions are favorable for an aurora. I also follow Facebook aurora groups which are sometimes a good heads up when conditions will be right.
Gear
Many people were able to get great photos of this aurora with cell phones, but for less intense auroras and for maximum flexibility in your editing, an interchangeable lens camera is best. I used a Sony A7RV, which is great for low light conditions. I also enjoy that this model has an LCD screen that bends in all directions, so it is easy to see what you have in your frame.
I used my wide angle zoom lens, 16-35 mm. This is a great choice for two reasons. The wide angle allows you to capture as much of the sky as possible. Also, wide angle lenses typically the the ability to go to wider apertures. This is what you want to let in the most light possible
A tripod is a must. Exposures for auroras are typically anywhere from 1-25 seconds, so we need to minimize movement of the camera.
Bring a head lamp, and know how to put it in redlight mode. Also, be courteous to other photographers and make sure to not aim your torch into their shots.
Focusing
Focusing is the tricky part with night photography. Manual focusing is the best approach. There are two main approaches to use with manual focus.
The first approach is to set your focus during blue hour, or before the sun goes down. This requires getting there early and setting focus while there is still light. You will want to focus on something far away, like distant mountain peaks.
The second approach is to set focus when it is already dark. You can do this by choosing a bright star to focus on. Zoom in on your display until the edges of the star are as crisp as possible. Take a few test shots and view the results zoomed in to see if you indeed have focus.
After setting focus, some people like to tape their focus ring in place. I don't generally do this, but I make a mental note of the focal distance on the lens and am careful to not touch it.
Settings
The shot I composed is a focus stack and exposure blend, for great detail in the foreground and sky combined. I will go through the settings for each shot.
For the aurora, I used an aperture of f/2.8. This is the widest aperture on my lens. I want to allow as much light in to minimize how high I must push the ISO. Next, I set my shutter speed. I mentioned earlier that the shutter speed can be anywhere from 1-25 seconds. It depends how fast the aurora is moving. We don't want to end up with a blob of color with no detail. I ended up with a shutter speed of 3.2 seconds; this resulted in good detail in the vertical lines of the aurora. Last, I set my ISO. The goal is to adjust the ISO to be as low as possible while still getting a good exposure as judged by the histogram. Most of the histogram will be to the left, as it is dark outside. They key things to watch is the green channel. It is easy to over expose the green highlights in the aurora. Make sure the tail of the histogram for the green channel is not clipped and does not extend beyond the right side of the histogram. I ended up with an ISO of 1260.
I took separate shots for the much darker foreground to detail in these parts of the image. The aperture was still 2.8 to let in all the light. The shutter speed was in bulb mode at 90 seconds. It is possible to do for these parts because they are not moving. Then, I can set the ISO much lower to reduce noise; I used around 400. I toom different exposures for the foreground and background, as f/2.8 has a very shallow depth of field. I used a flashlight to set focus on the evergreen branch as the very last step.
Processing
Processing was mostly in Photoshop in order to combine the sky and foreground exposures. I used Topaz to reduce noise in the sky and add sharpness to my images. It really does a much better job than what I can do on my own.
The layers are combined with masking. Since the foreground tree branch was taken minutes later than the sky, I used a duplicate layer of the sky image set to Color mode to add the original reflection color back from the same time as when the aurora was taken.
Final Thoughts
What an amazing opportunity. It's crazy to me that in one year I've photographed both an eclipse and aurora.
I do want to point out to anyone who has not seen an aurora in person, that the camera sees a lot more than the naked eye. Even a cell phone camera sees much more. I could see with the naked eye white bands across the sky, with some subtle greens and magentas. And, overall it was very bright out; it was like a full moon was out even though it was really only a sliver crescent. So, I was very glad to have my camera, because that's where the real show was. Sometimes you can see the colors with the eye but not always.
Why does the camera see more? Our eyes are less sensitive at night. In the eye, cones see colors and rods are for black and white. The rods are primarily for night vision. The camera doesn't have this limitation.
Happy aurora hunting!
Contacts
annette@annettesjphoto.com
Socials
Copyright © 2023-2025 Annette Stiers Jones Photography. All rights reserved.