Planning a Sun/Moon Alignment
How do I get so lucky with all these alignment shots? Do I just wait for hours and days? No. Short answer is: there's an app for that.
8/29/20245 min read
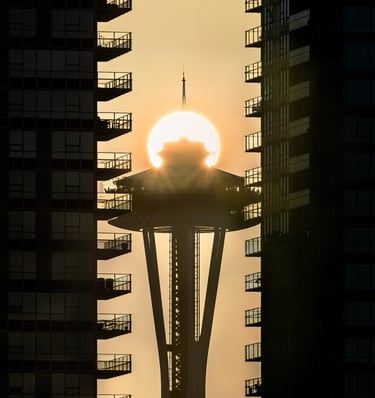
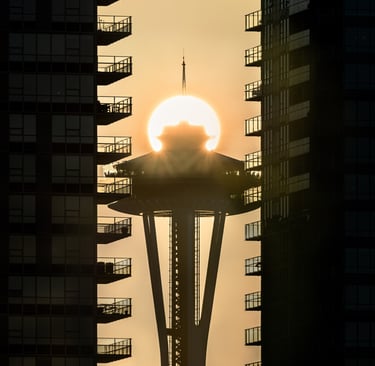
Planning sun and moon alignments with subjects is so much fun. It reminds me of hobbies like geocaching, or even catching rare Pokemon on Pokemon Go. The shot is there; you just have to find the right time and the right place.
It isn't luck, it isn't Photoshop: it's an app. There are actually several apps out there now that can help you plan shots like these. I started out with Photo Pills, so I will be showing here how to plan a shot using this tool.
Step 1: Download App from the App Store
Photo Pills is available on Android and iPhone. You can also check out their website here. They have tons of great tutorials on YouTube, so definitely check those out.
Steph 2: Open the Planner
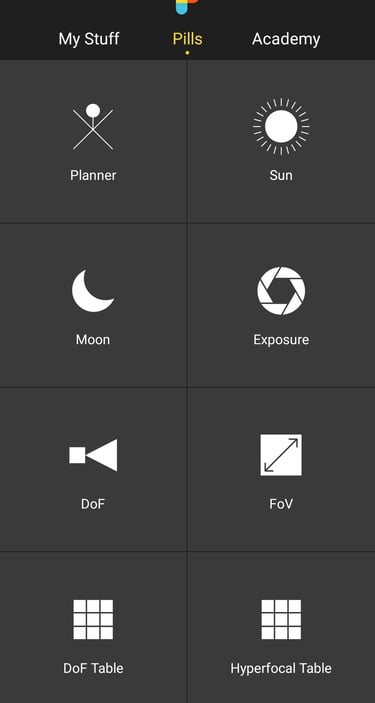
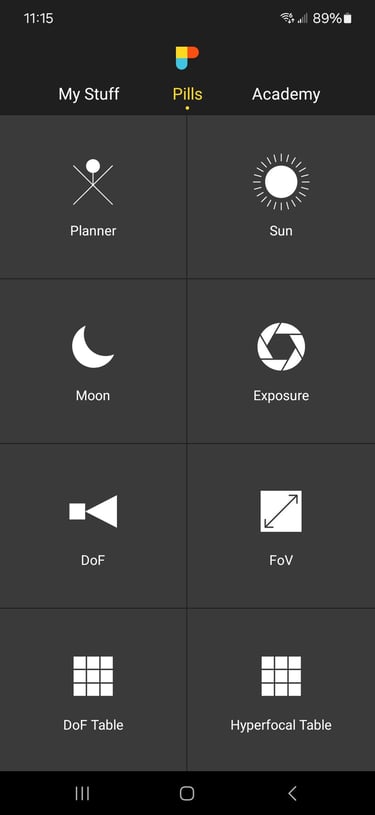
The Planner is on the center panel, "Pills," when you open the app. Click once on the Planner square.
Step 3: Place Your Pins on the Map
When you open the Planner, you will see a map. The red pin represents where you are. The black pin represent your subject. You can activate and deactivate the black pin by clicking the red/black pin icon from the swipe across menu bar at the top. If you don't see it, just swipe left or right on the top bar until you see the red/black pin icon.
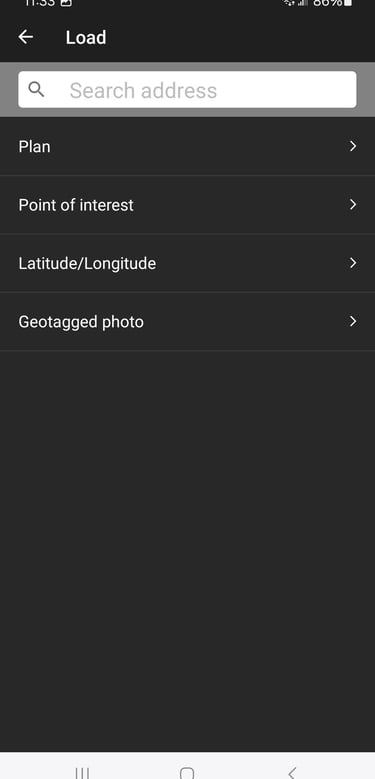
To place the pins, you can click, hold, and drag them manually. But an easier way is to use the load feature at the bottom of the screen. Load only works for the red pin, but we can use a trick to load locations for both pins.
First, deactivate the black pin by click the red/black pin icon at the top. Then, press the load button at the bottom of the screen. You can then search for anything on the map just as in Google maps. Search for the subject of the photo first. In this case we'll put in Space Needle.


The red pin will now be on the Space Needle. However, we want the black pin to be on the Space Needle. So to switch pins, click on the red/black pin icon at the top of the screen to bring the black pin back. Then, click on the plus symbol on the bottom right corner of the map. Several icons will pop up; click on the one that shows the two pins with switch-aroo arrows (not a technical term, but it gets the job done).
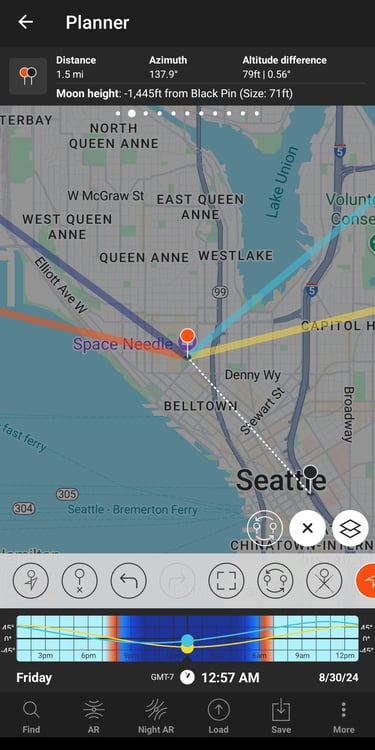
The black pin will now be on our subject, the Space Needle. Now we can load the location of the red pin, representing the location of where we will shoot the photo. Use the same procedure using "Load" at the bottom of the screen. Let's say we want to be at Kerry Park. Click load, type in Kerry Park to the search bar. The red pin will now be at Kerry Park.

Step 4: Search for Alignments
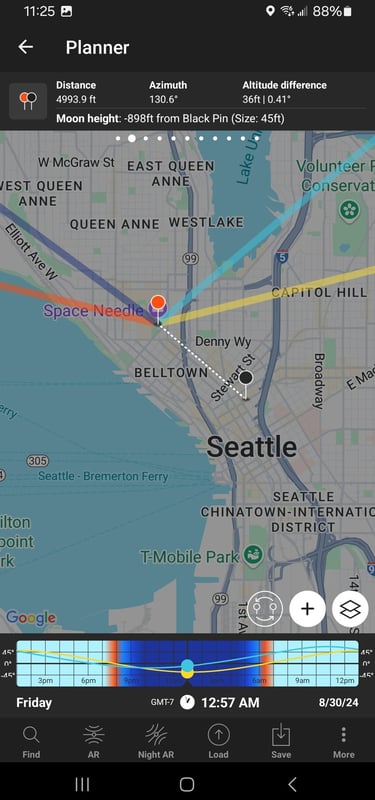
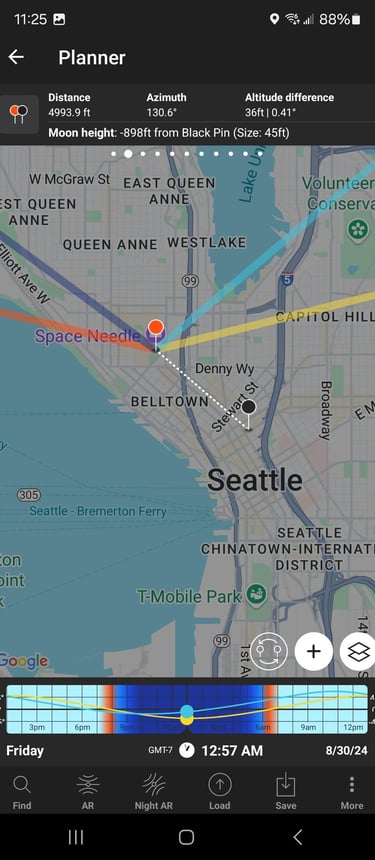
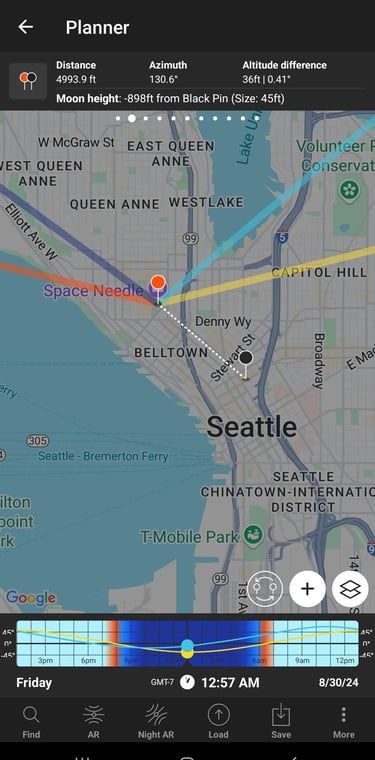
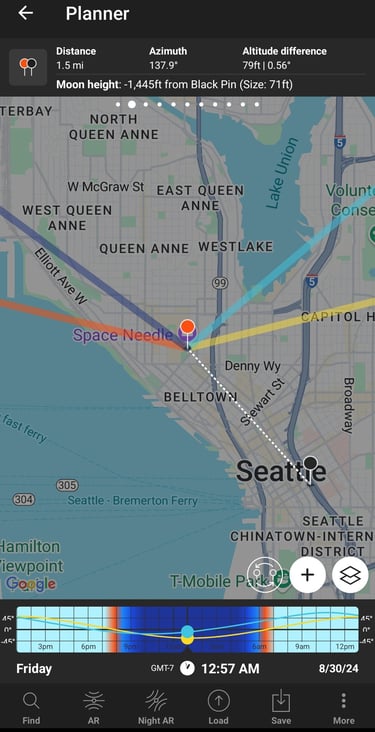
Now that we have our pins in place, we can search to times when the sun and moon will align with the subject. The blue/light blue/red slider at the bottom of the map indicates time. We can slide this left and right to adjust the time. As we do this, we see that the lines emanating from the red pin move. The thick orange/yellow lines indicate the direction of sunrise/sunset from where you are standing (red pin). The thick blue/light blue lines indicate the direction of moonrise/moonset from where you are standing. And, the thin orange/blue lines indicate the current position of the sun/moon at the time indicated on the time slider.
So, we could manually drag and adjust the time to find an alignment. But there is an easier way to plan. Click on the "Find" icon at the bottom left of the screen. You can then choose to find the Sun or Moon. Let's choose moon.
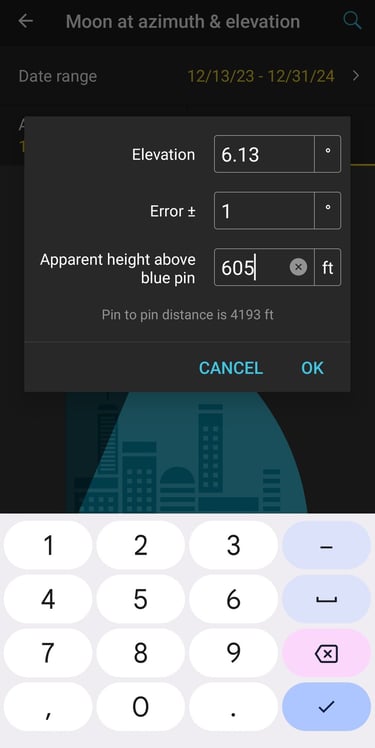
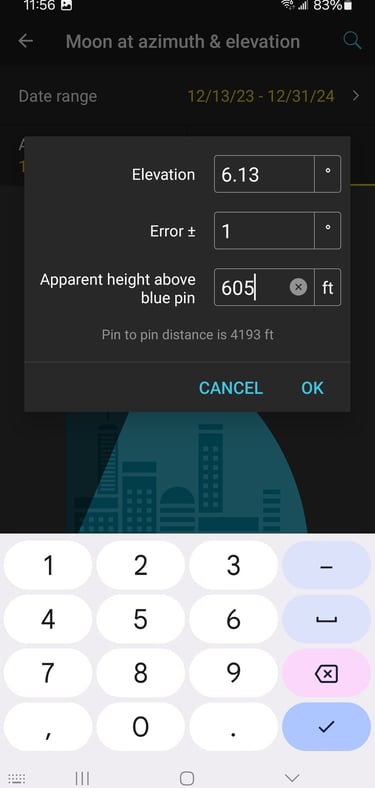
A new screen pops up to enter our search parameters. The azimuth will typically load to be in line with the black subject pin. The elevation will also be representative of the black pin, but at ground level. The Space Needle is 605 feet tall, so we need to account for that. Click on elevation, then click on the "Numeric" icon at the bottom right of the screen. Enter 605 ft into the apparent height above the blue pin.
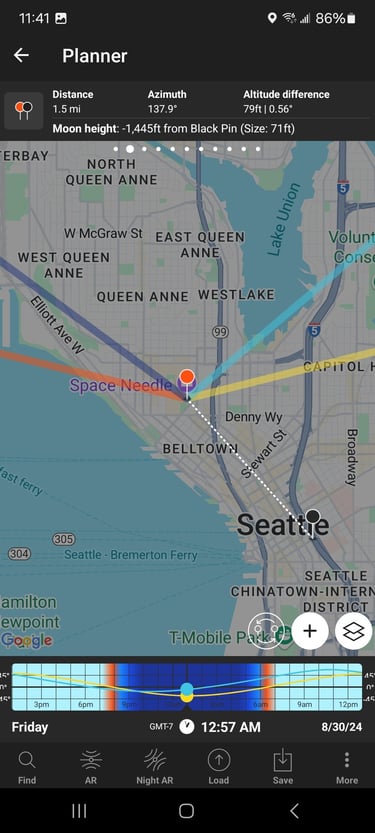
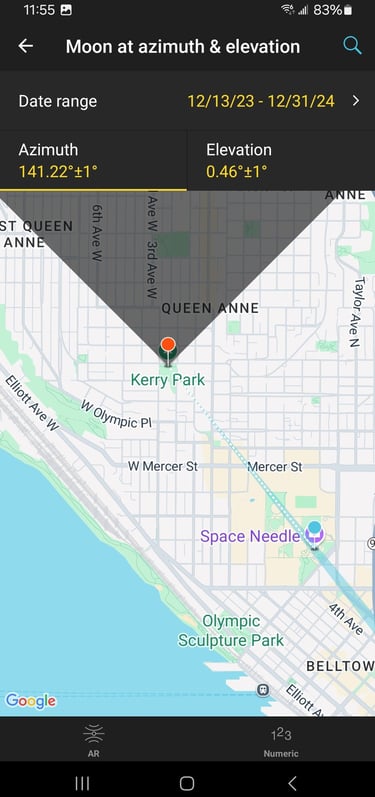
You can also change the date range for search here if you like. Now we're set; just click blue search icon at the top right corner of the screen.
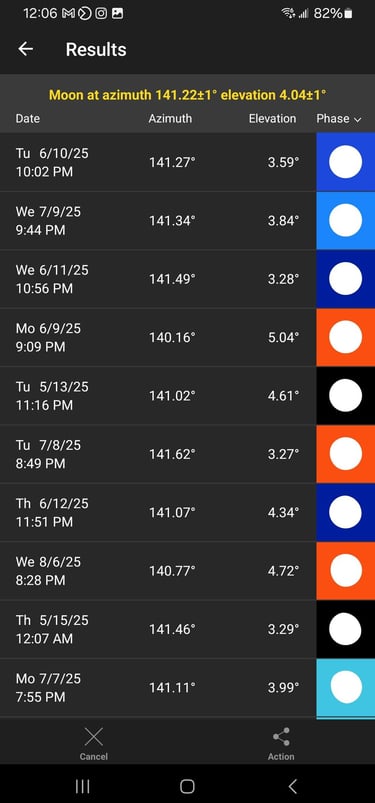
We then get a list of all the times the moon will align with the subject according to our search parameters. You can sort the results by date, azimuth, elevation, or phase. I like to sort by phase so I can see full moon alignments.

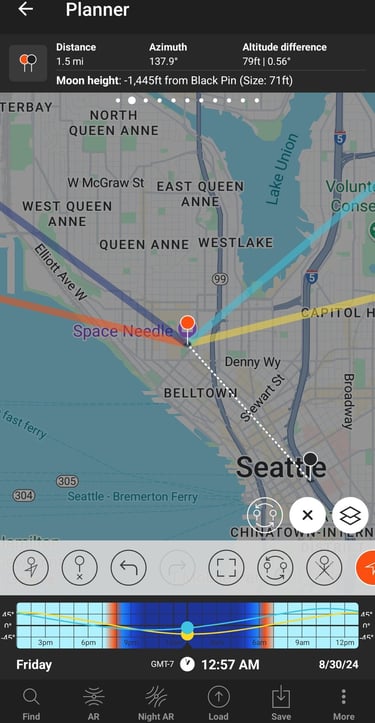
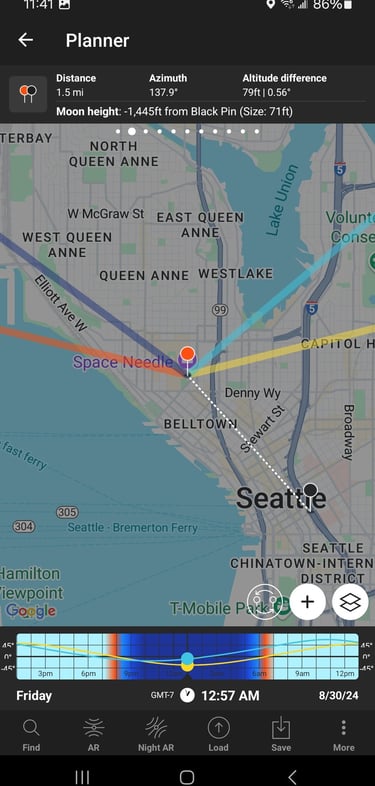
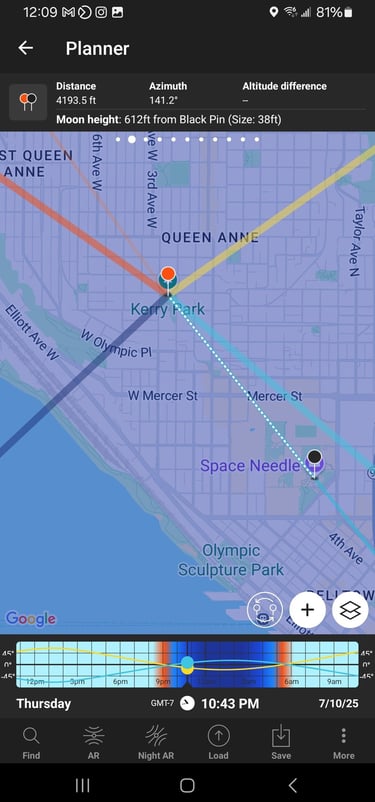
You can then click on any specific alignment to bring it up in the planner and see the details. It will show you the exact moon height and moon size (relative to subject), and the exact time of alignment. In the example below, you can see the the blue line is in line with the dotted line between our location and the Space Needle. It also tells us that the moon will be at 612 feet, so quite a bit above the Space Needle. If you'd like heights that are more exact, you can reduce the error in the same "Numeric" panel that we used to input the height.

Those as the Basics! Four easy steps to alignments.
There is a lot more the app can do, so definitely check out their You Tube tutorials. It really is an amazing tool. The same app can be used to plan Milky Way alignments, eclipse shots, meteor showers, and more.
A step 5 that is also critical is finding out where are the places you can shoot your subject. A good pointer is, the further away you are from your subject, the smaller it will appear. This is how you get the really big moon photos, by making your subject look small in comparison and then zooming in with a telephoto lens, like 400 or 600 mm or even more.
The other fun thing about photos like these is that you almost always meet other enthusiasts at the same location, at the same time.
I hope this sparked your interest! Look for additional posts on this topic in the future on gear set up and settings. And, check out more great alignments of the moon and sun with buildings and mountains in my Astrophotography Gallery.
Contacts
annette@annettesjphoto.com
Socials
Copyright © 2023-2025 Annette Stiers Jones Photography. All rights reserved.