The Fastest and Cleanest Way to Create Exposure Blends
A step by step guide for creating a properly exposed image of dark foregrounds and bright skies.
4/7/20257 min read
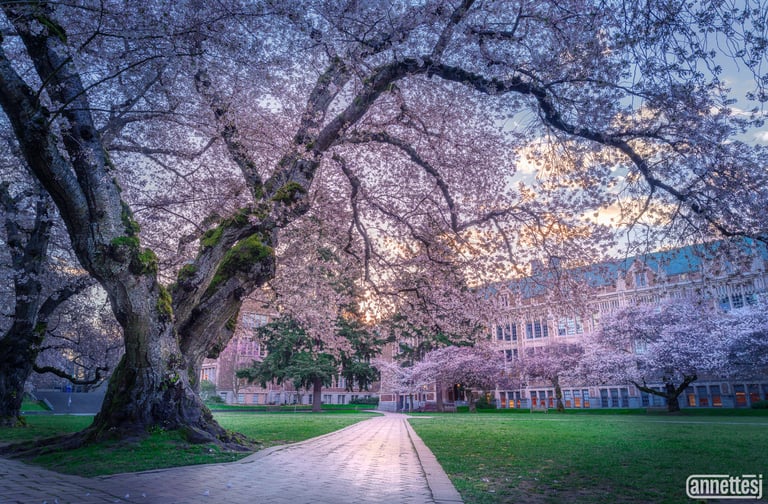
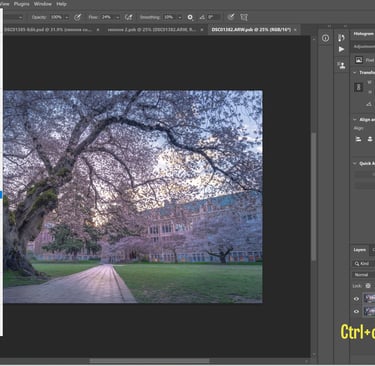
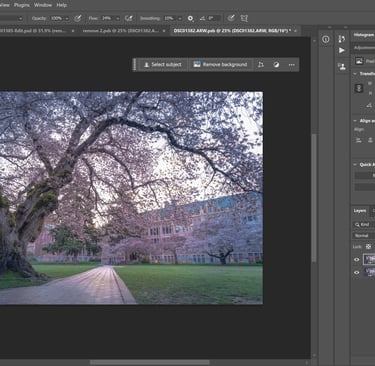
It's cherry blossom season! Trees are blooming everywhere now; beautiful pink, white, and magenta blossoms are lighting up all the streets and neighborhoods. This includes the 90-year old cherry trees at the University of Washington campus. I took this photo of them 2 years ago. But in that time I have learned a lot about post-processing. I took what I thought at the time was just an ok shot, but I recently revisited it and was able to turn it into something really exceptional. And I did this primarily with one tool: exposure blending.
What is Exposure Blending?
Exposure blending is a photographic technique utilized to capture high dynamic range (HDR) scenes, where there is a significant contrast between light and dark areas. Natural landscapes, particularly those at sunrise and sunset, often present such dynamic variations, making it challenging for a camera’s sensor to accurately represent the full spectrum of light. Often, adjusting for properly exposing the dark area results in clipped highlights, and adjusting for properly exposing the light areas results in clipped shadows. Clipped means that there is no recoverable data in those areas.
To address these limitations, photographers often resort to a method known as bracketing. This involves taking multiple exposures of the same scene at different exposure levels so that both highlights and shadows are captured in detail. By blending these exposures together, it becomes possible to create a final image that embodies a more realistic representation of the scene, replicating the actual nuances of light and color that the human eye perceives. This approach yields images that are richer in detail and visual appeal.
In the Field: Taking Photos for Exposure Blends
Creating an exposure blend requires some planning to achieve the desired results. A tripod is critical for this, as we want to maintain the alignment of the frames across different exposures. Using a tripod not only stabilizes your camera but also ensures that each shot remains consistent in composition, which is vital for seamless blending in post-processing.
Equally important are the camera settings and bracketing techniques employed during the shoot. Since we are on a tripod, I usually like to set my camera to Aperture Priority mode. In this mode, I adjust the aperture and ISO, and the camera will balance the shutter speed for exposure. For a scene with a pretty high depth of field like this one, I would choose an aperture like f/11 or even f/16 to make sure the entire scene is in focus. I set my ISO to 100 or as low as I can to reduce noise. Then I check the shutter speed and make sure it is not so slow that any wind in the trees blurs the branches, adjusting ISO as needed to correct.
Take a few test images; check your focus and check for any motion blur. Now, time to bracket. On my Sony A7RV, there is an exposure bracketing drive mode. It allows me to choose how many exposures to include in the bracket, and how many stops to vary the exposure between images. I generally like 3 exposures +/- 2 or 3 stops. Then, when I press the shutter button, my camera will take all three exposures sequentially, varying the shutter speed for each exposure. I review the images and make sure that within the three images I have an exposure with the highlights properly exposed and another with the dark areas properly exposed.
If your camera has a feature like this, you might consider (if you're a gambler) shooting your exposure bracket without a tripod. If the shutter speeds are fast enough to hand hold, you might be able to get away with it. But, for best assurance of results, just use a tripod.
Blending Exposures in Photoshop the Fast and Easy Way
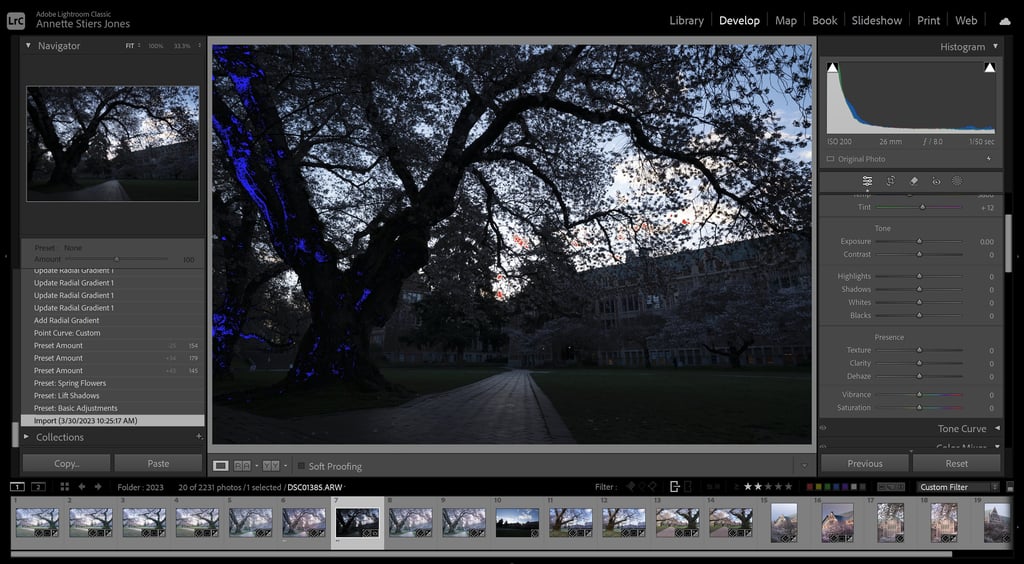
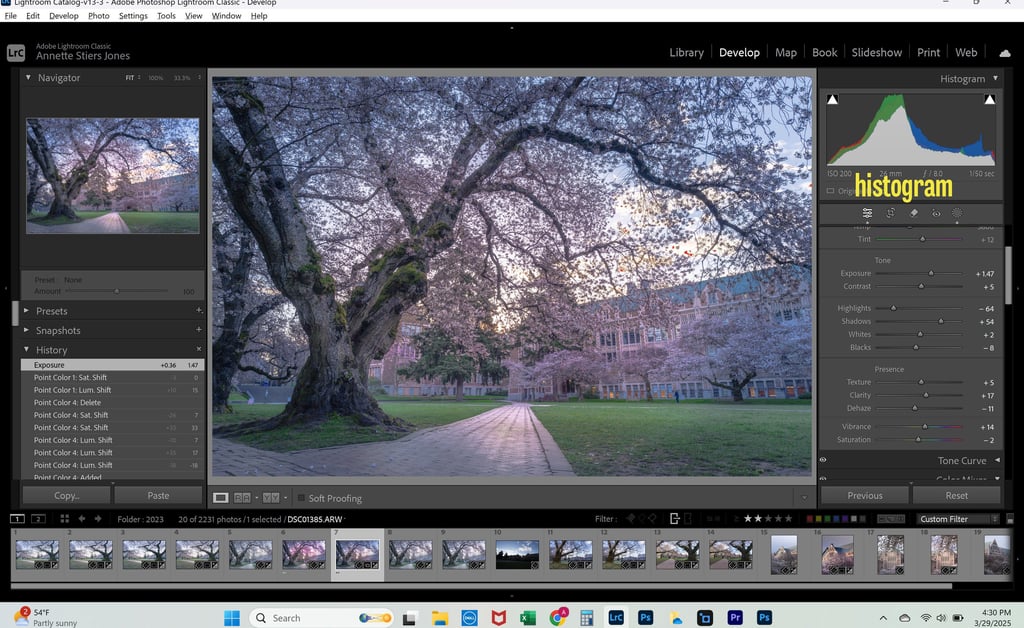
After capturing the images, I first import them to Lightroom Classic. I apply some basic edits and identify the best images for exposure blending. I'm looking for in focus images with no motion blur, at least one image with no clipping of the shadows, and at least one image with no clipping of the highlights. You can easily see clipped shadows and highlights by turning on the indicators above the histogram (the two triangles) in the develop module. You can turn these on/off by clicking the "J" key. Clipped shadows will appear blue. Clipped highlights will appear red. Choose one image with no Blue areas as your shadow exposure, and one image with no Red areas as your highlight exposure.
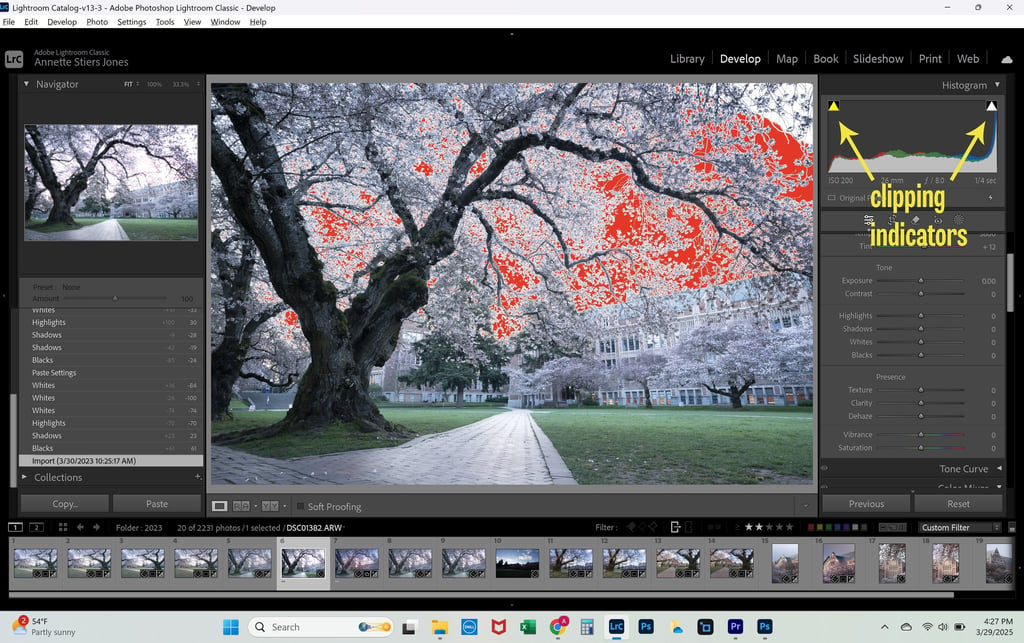
Shadow exposure image pre-edits. Blown highlight are indicated in red.
Highlight exposure image pre-edits. Clipped shadows are indicated in red.
I like to make sure the images look pretty similar before I import them. If I apply any color correction, add texture, sharpening, etc., I sync those between images. I also try to make sure that the histogram looks pretty similar for the shadow areas and midtones before importing to Photoshop. For example, in these two exposures I make sure the histograms for the two images are similar for the left side (midtones and shadows) and that the darker parts of the trees look visually similar. In the shadow exposure, the sky will of course still look blown out and there will be a corresponding spike on the right side of the histogram. This is what we will correct in Photoshop.
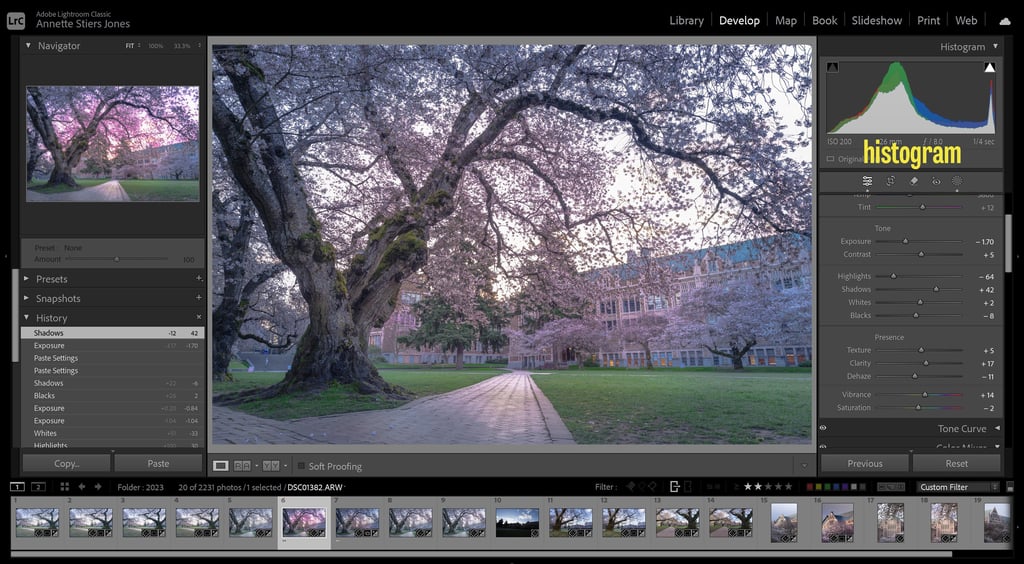
Shadow exposure with edits applied. Sky is still overexposed, indicated by a spike on the right side of the histogram.

Highlight exposure (sky exposure) with edits applied. Shadows and midtones look similar to the Shadow Exposure, histograms are similar.
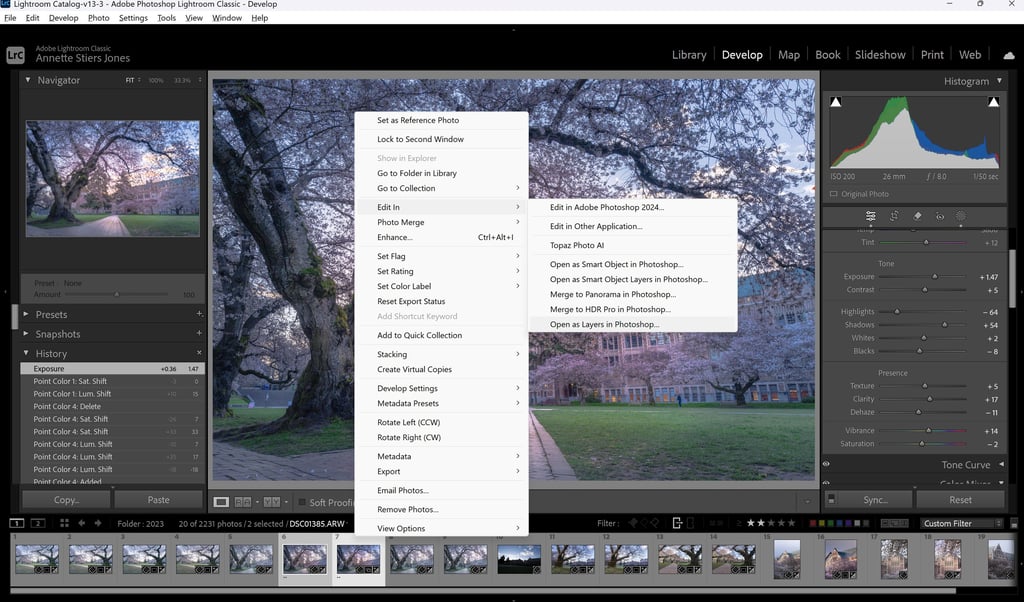
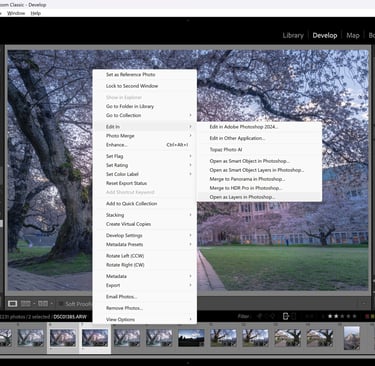
Select your images in the filmstrip by clicking on them and holding the control key. Then right click and select "Edit In" and "Open as Layers in Photoshop."
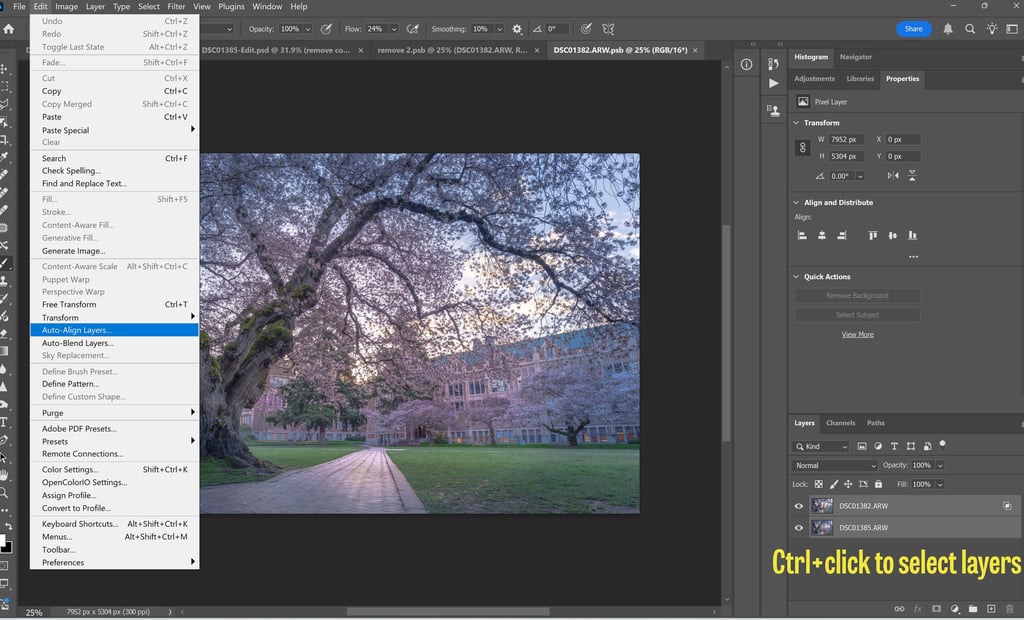
Photoshop should now be open with both of your photos open in the Layers panel. Select both photos in the "Layers" panel on the right, but Ctrl+click on each layer. Then go to "Edit," then "Auto-Align Layers." This will align the two images if there was any subtle shift between the exposures.
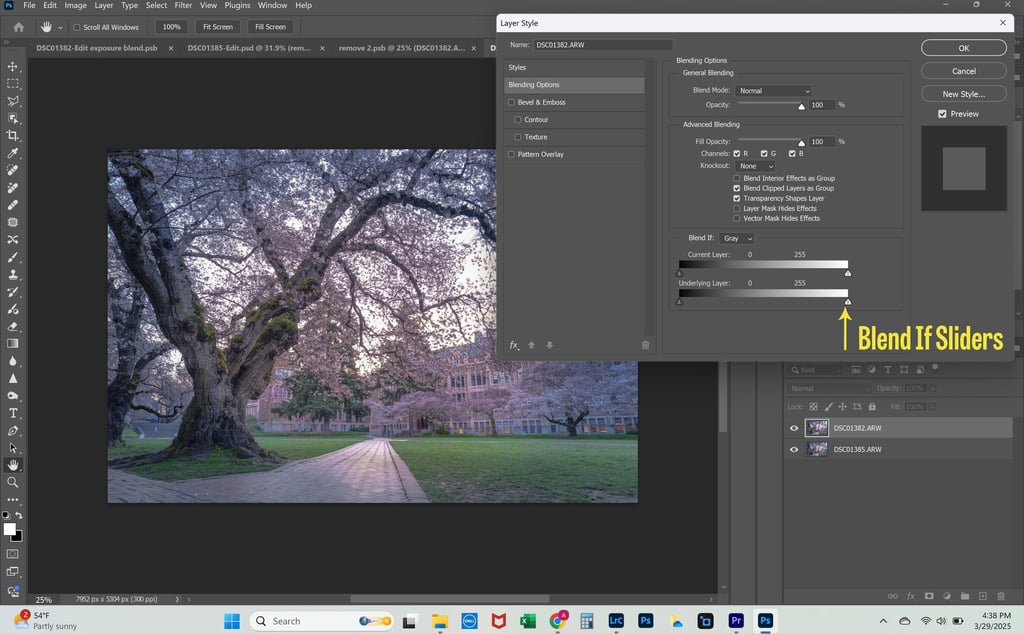
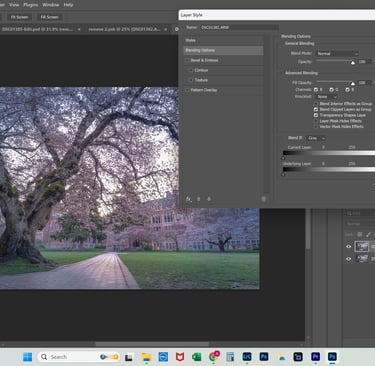
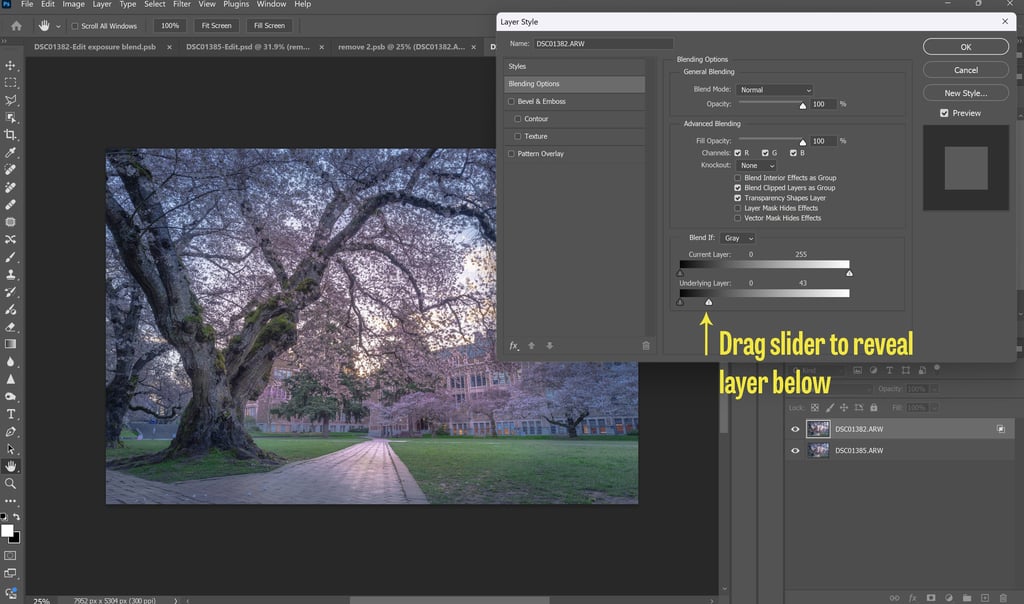
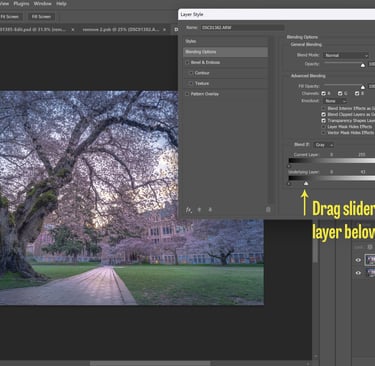
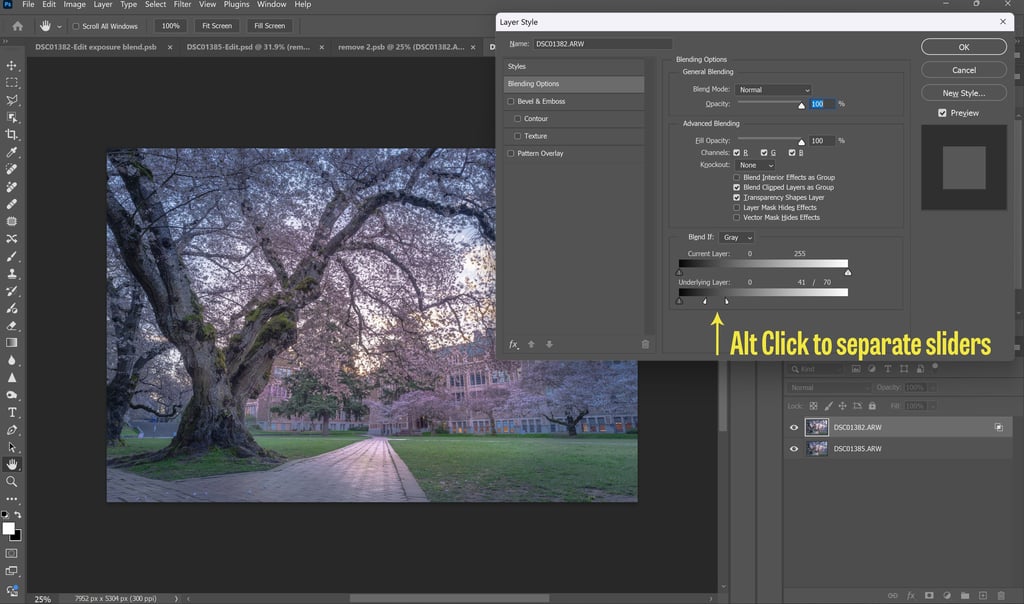
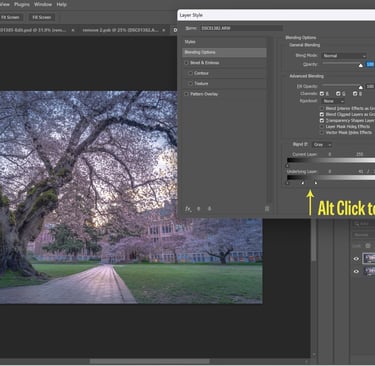
Make sure your exposure for the shadows (the one with the blown out sky) is the layer on the top. You can do this by click and dragging the layer to the top of the stack. Select that layer, then click the "fx" button at the bottom of the layers panel. From that list, select "Blending Options."
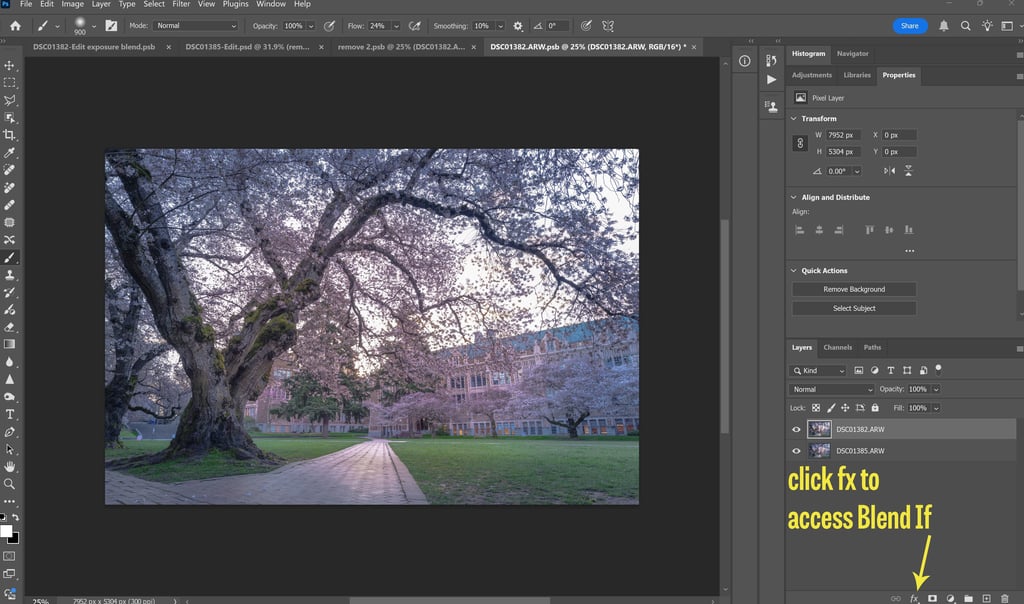
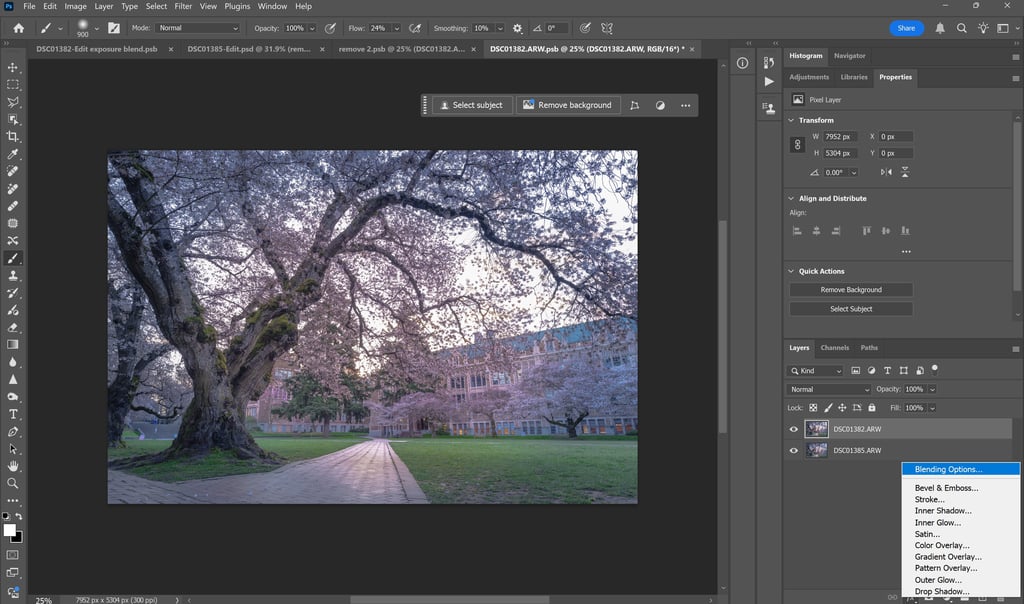
Select fx button, then choose Blending Options from the menu
You will see a Layer Style dialog pop-up. Go to the section, Blend If. What we want to do is have the underlying layer's sky, with the correct exposure for the sky, to show through the top layer. Click the carrot symbols to the right side of the Underlying Layer slider. Click, hold, and drag it to the left. It will start to show through the bottom image in the brightest parts of the top image (the blown out sky). This can sometimes create harsh transitions between the two images, especially if there are areas where the midtones or shadows are no the same between the two photos. To correct this, hold Alt key and click the middle of the carrot on the slider. The carrot will split into two. Then you can drag them apart to create a smoother transitions of where the image below shows through.
That's it! No complicated masking or plug in panels required.
I did try processing this image two ways: exposure blending, and by just bringing up the shadows in the highlight exposure, even though the shadows were clipped. You can see differences in the of the dark areas of these textured tree trunks. The exposure blend has cleaner detail. This becomes more important when you intend to print big, like in my gallery, more I offer some prints in acrylic up to 56x84 inches.
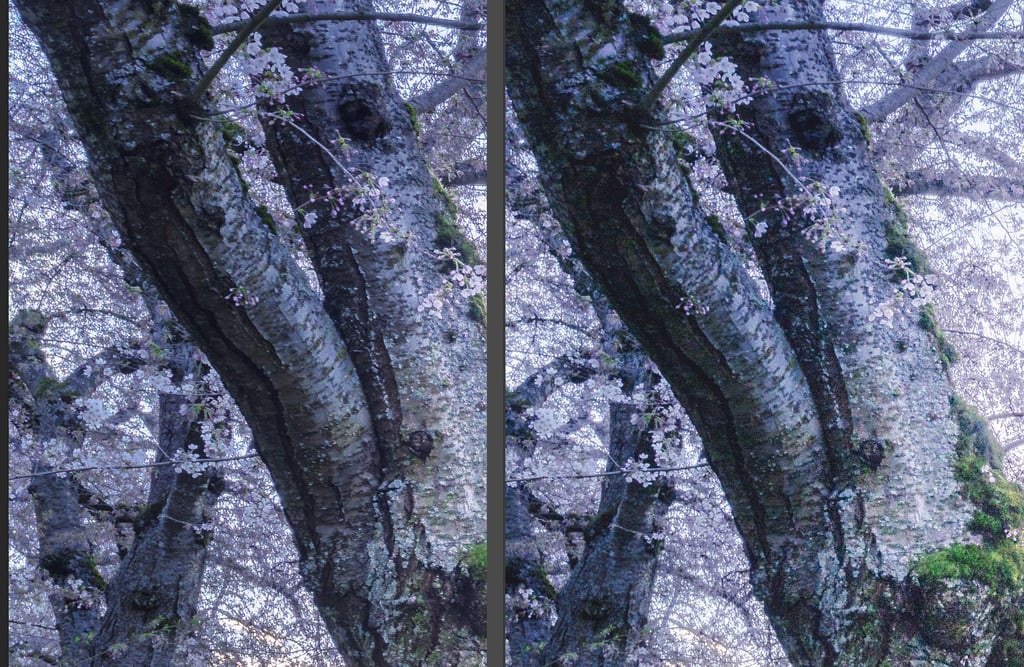
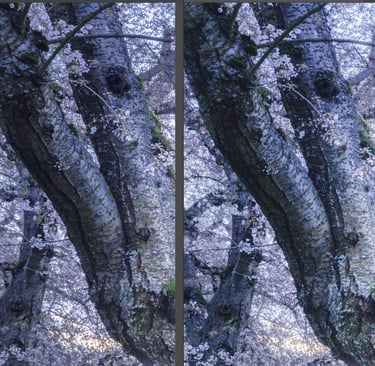
Image on the left is an exposure blend. Image on the right is the sky exposure with shadows brought up significantly. The exposure blend has better detail in the shadows, less noise, and clearer detail.
Don't Let High Dynamic Range Stop You
This simple trick using Blend If can help you create beautiful images of sunrises and sunsets with stunning detail in the foreground. It's a great way to overcome the limitations of the camera, and present the scene as the eye really sees it. Give it a try and you'll get great results without any complicated masking.
Contacts
annette@annettesjphoto.com
Socials
Copyright © 2023-2025 Annette Stiers Jones Photography. All rights reserved.