Long Exposures to the Rescue
Faced with a boring, ordinary scene? Create something extraordinary and engaging with this simple technique.
LONG EXPOSURESCOMPOSITIONPOST-PROCESSING
Annette Stiers Jones
6/21/20259 min read
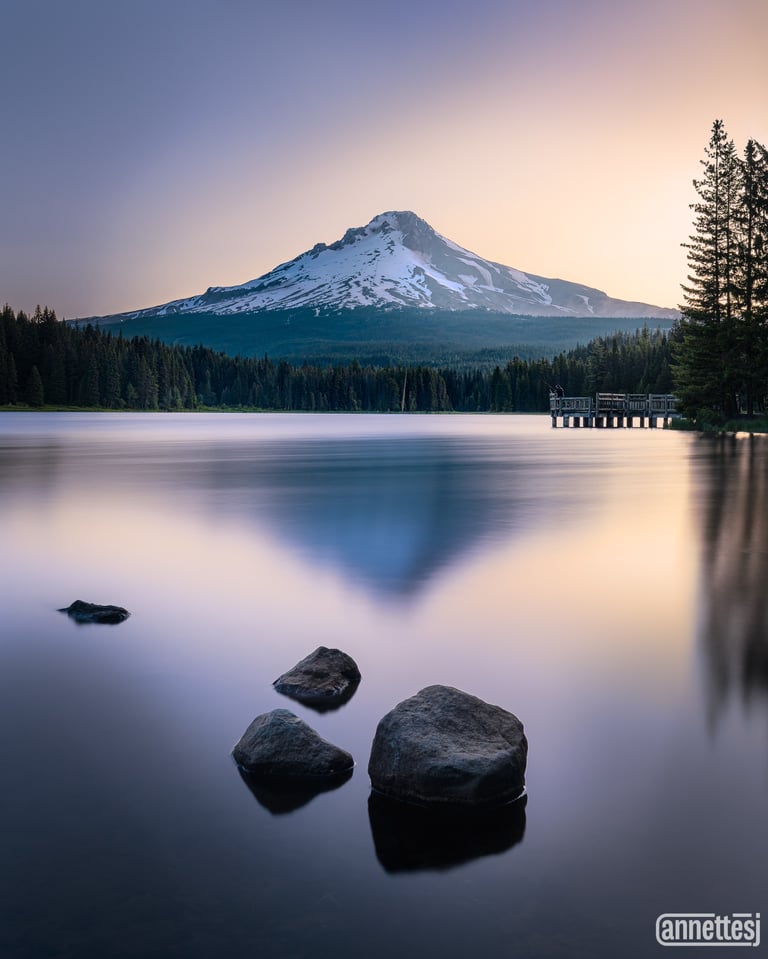

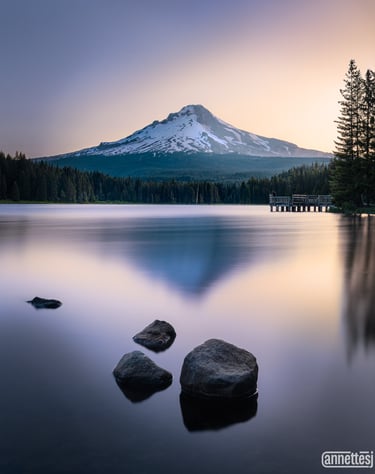
I had wanted to visit Trillium Lake for a long time. I had seen so many shots of Mount Hood perfectly reflected in its still waters. So, when I finally scored a campground reservation, I had very specific expectations about the shot that I wanted. I wanted that perfect reflection with an epic sunrise or sunset painting the sky.
The weather was beautiful during my trip there; not too hot, not too cold, no smoke. A few years ago, I would have been elated at these conditions. But, my requirements had grown so much more specific since taking up landscape photography. There was a gentle, unrelenting breeze causing a ripple on the waters surface. No perfect reflections were to be had. There were also no clouds at all, making for a pretty boring sunrise and sunset.
What to do? I instinctively turned to my favorite technique for taming rippled waters: long exposures.
With long exposures, you hold the shutter open on your camera for several seconds. During this whole time, the water is moving. Hold it open long enough, and eventually the water's movement will blur the resulting image into something that looks smooth as glass. The resulting images can be quite unique and impactful.
When Long Exposures are Useful
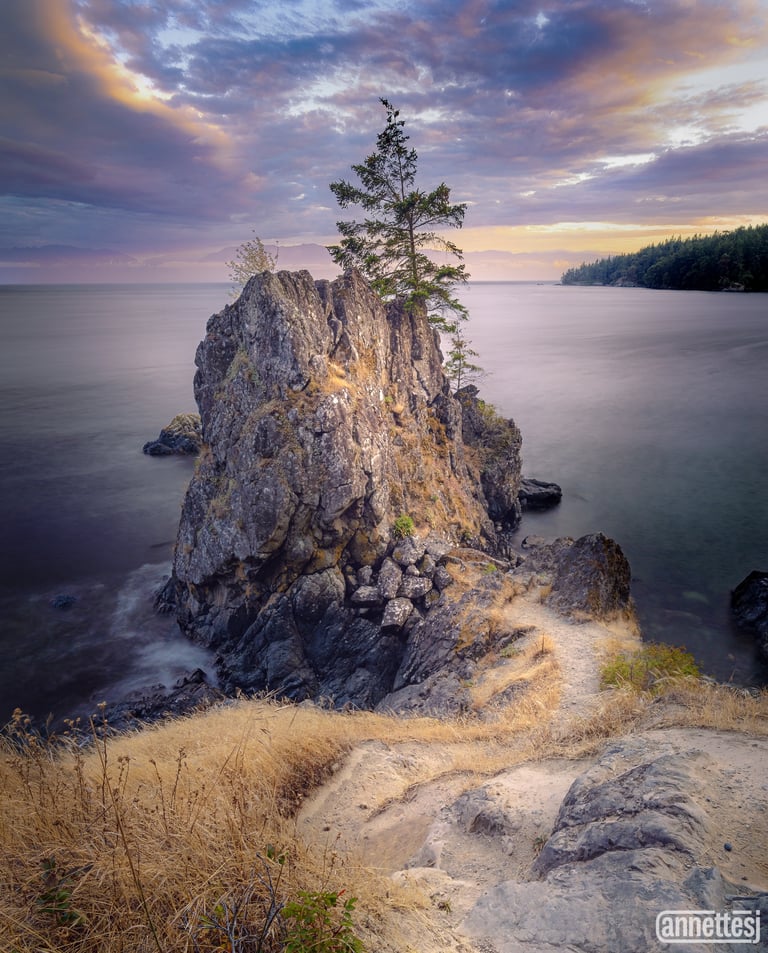
My favorite use of long exposures is to smooth the surface of bodies of water. Choppy water due to wind can make a photo busy, and, well, ordinary. Any smart phone can take a photo of the water just as it is. But with the right tools for long exposure, you can elevate the image to something artistic and unique. The long exposure combined with the motion of the water makes the water surface look smooth as glass. This can be great for adding a sense of peace and calm to an image. In some instances, long exposures of waves breaking on rocks turn into an ethereal mist. This softens the image and creates an almost magical look.
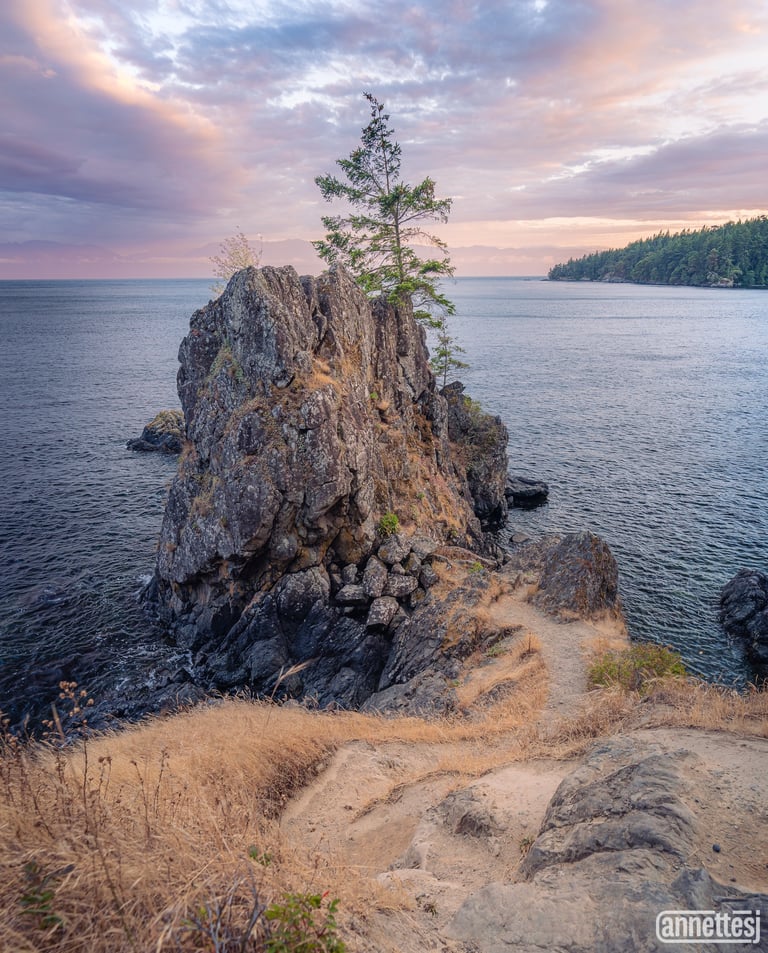

1/20 s exposure freezes the motion. The choppy water creates a sense of unrest in the image.

Final image of this scene with a long exposure. The water in this image was a 20-second exposure. Reducing clarity of the water with a mask further softened the look of the water, creating a calm scene.
Light painting is another great instance to use long exposures. This is a great chance to get creative with your headlamp, a flashlight, car headlights, or any source of light at your disposal. Just set your camera up on your tripod, open the shutter, and create your own movement with light. It can take some trial and error to get the movement and exposure just right, but the results can be interesting and unique.
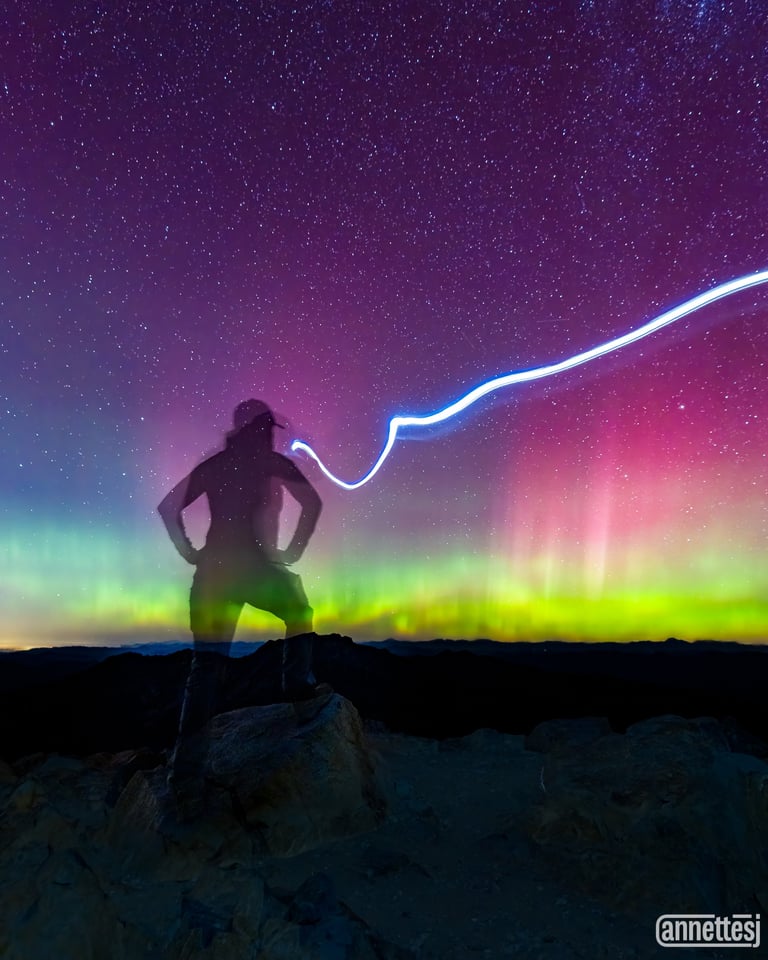
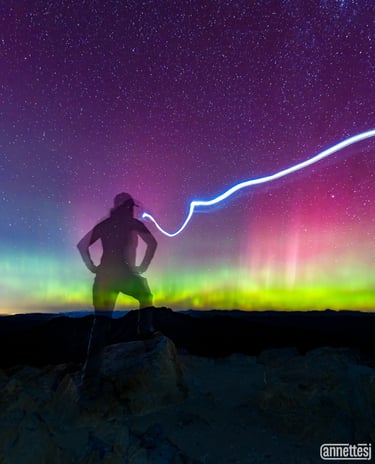
Long exposure of myself in front of an aurora. My camera was set on interval shooting, taking one 13-second exposure after another. My intention was to get just a silhouette, but this shot as I walked away with my headlamp on was pretty fun.
Essential Gear for Long Exposures
The are three things which are most important to enable long exposures: a tripod, an ND filter, and a remote shutter release.
A tripod is essential for long exposures. With long exposures, you are leaving the shutter open for multiple seconds, or sometimes minutes. Hand holding without creating movement is not going to be possible in these situations.
An ND (neutral density) filter will also often be needed. ND filters block a certain amount of light from getting to your camera sensor. They go onto your camera lens similar to a CPL (polarizing filter) or UV filter. Why do we need to block light? With long exposures, we are holding the shutter open for several seconds to allow motion to blur the image. That amount of time is going to be set by the motion of the subject and the look we want to achieve. The remaining two levers in the exposure triangle are aperture and ISO. In some cases, there may be so much light coming in over that amount of time, that we simply cannot make the aperture small enough or ISO low enough. We may be our aperture all the way to f/22 or ISO <100 and still be over exposed. This is where an ND filter can help. An ND filter will take away several stops of light, allowing you to set your aperture to something more reasonable with a balanced exposure. In my kit, I have an ND 1000 (10-stop) filter. I wish that I had something a bit less, such as ND 64 (6 stop) filter. Sometimes I find ND 1000 can be too much light reduction, and I'm boosting my ISO pretty significantly to compensate. But if I had to choose one, I would still go with ND 1000.
The next thing you'll need is a remote shutter release. This may not always be necessary, but if your shot requires a shutter speed longer than 30 seconds, your camera shutter speed will most likely need to be set to "bulb mode." A remote shutter release can be wired or wireless. The main purpose is to allow you to activate the shutter without actually touching the camera; depressing the shutter directly on the camera will introduce camera shake, resulting in a blurry shot. I have this wired remote shutter release in my kit. One thing I appreciate about the wired release is that I do not have to worry about a dead batter or connectivity issues. It's also very inexpensive. There are definitely fancier options out there that offer many more features, but I've found this works just fine for me.
Compositions for Long Exposures
Long exposures for choppy bodies of water are a great alternative when you have another subject in the frame. This could be a mountain, rock formations, or a pier; something else that tells the story of the place. The water then becomes more of a supporting element of the compositions. I like to keep the lighting in these types of shots soft, such as at sunrise, sunset, or blue hour. In general this lighting is best for landscape photos, but in particular it is a good pairing; soft lighting to go with soft, smooth water.

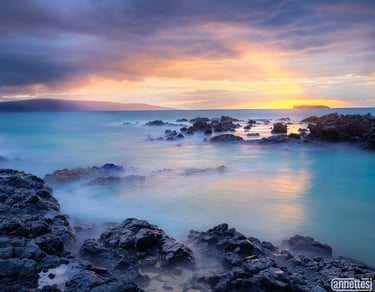
Sunset on a beach in Maui. The ocean in this image was exposed for 30 seconds.
If you're using long exposures for light painting, this can be a great opportunity to create leading lines in your composition. Car trails along a road are a classic example of this. If you're using a flashlight or a headlamp, you can selectively direct the light to the main point of focus of your image. This can work well in low light after the sun has gone down.
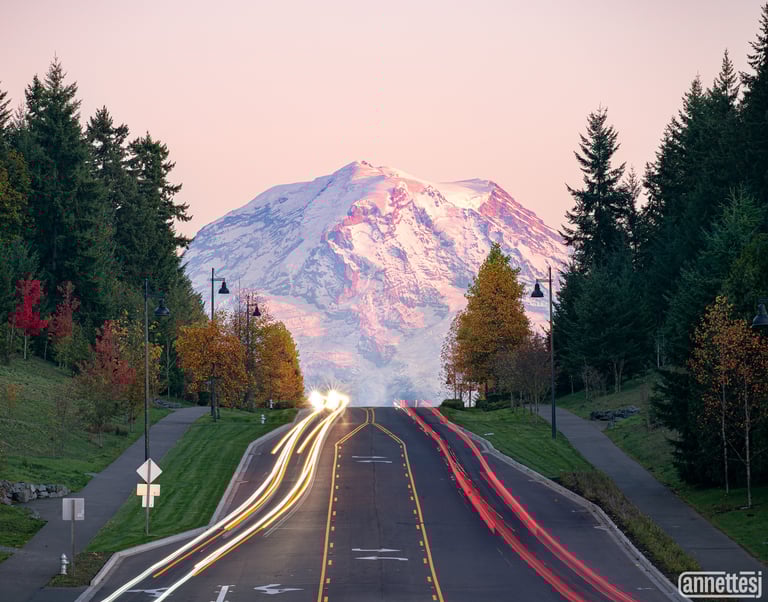
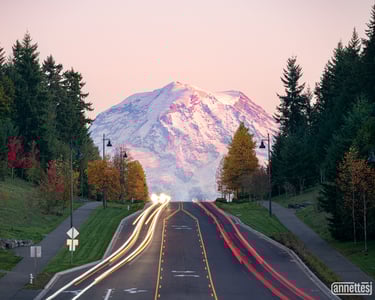
Car trails leading to Mount Rainier along a road. The car trails were exposed for 10 seconds.


Light painting at Multnomah Falls with Northwest Aperture. The lighting is not permanent fixtures, but flashlights. The falls here were exposed for 30 seconds.
Settings for Long Exposures
There is really only one answer here; it depends. I definitely recommend manual mode for long exposures. Your next priority should be to set your shutter speed to get the look you want to have. This may depend on the movement of the water. I have used anywhere from 20 seconds to 2 minutes. It will take some experimenting and test shots to get it right. To get shutter speeds longer than 30 seconds, turn your shutter dial as far as it will go until it says "bulb." Then, connect your remote shutter release.
When you have the shutter speed as you like, you can refine your aperture and ISO to balance exposure. Aperture will also depend on the depth of field you want to have. You can always resort to a focus stack if you need to, or you can use a narrow aperture like f/16 to get as much in focus in one shot as possible. Then, set your ISO to balance exposure. If you find that you cannot get your ISO low enough and you are still over exposed, this is when you can put on your ND filter. Don't forget to refocus after you add the filter.
Review your images. Check your histogram to see if you are clipping any highlights or shadows (histogram will be cut off at either the right or left side). Keep in mind that with long exposures, anything moving in the frame will be blurred, not just the water/lights. If you are a lake surrounded by trees, the same wind causing ripples in the water are going to blow the tree branches. In this case you will want to take a second exposure with a fast shutter speed to freeze the motion of the trees. You can then blend the two exposures later in processing.
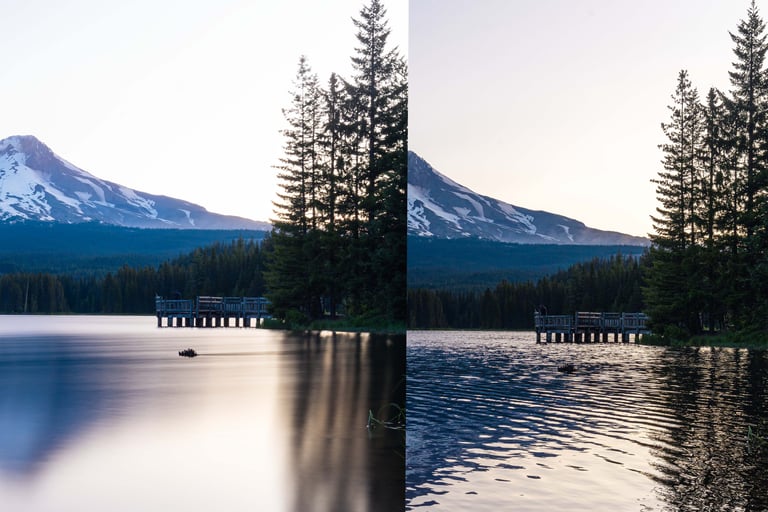
In the long exposure on the left, the water looks great, but the trees are blurry because they are moving, too. The faster exposure on the right freezes the motion of the trees. I will show how to combine these two exposures in the next section.
Processing Long Exposure Images
Processing is very similar to any photo. The exception may be if you need to blend two exposures, as in the example of a windy lake surrounded by trees. I'll show the steps for how to blend two exposures in Lightroom and Photoshop.
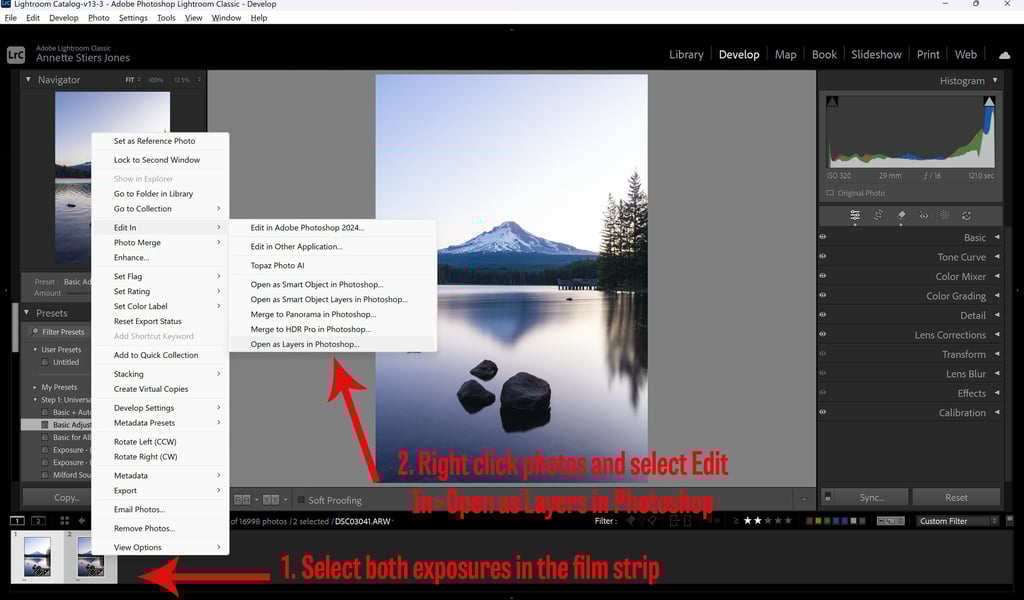
I begin my importing my photos into Lightroom Classic. I apply basic lens correction and lighting adjustments, keeping each exposure as similar looking as possible. I review each image and select my best two exposures, one for the water, the other for the trees. I select those photos in the film strip at bottom, right click on them, then select "Edit In" and "Open as Layers in Photoshop."
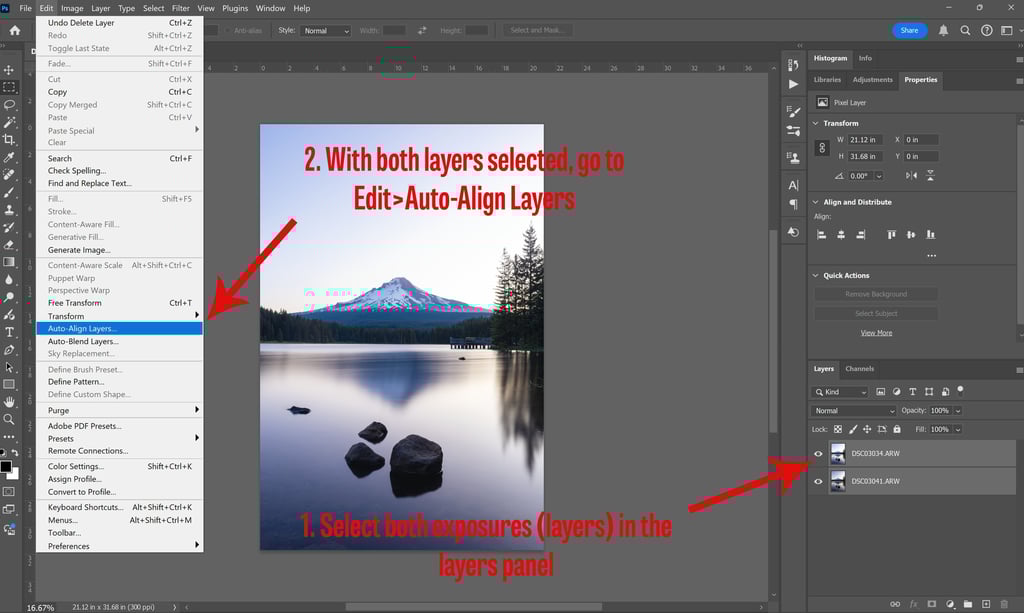
Once imported, the photos will appear as a stack in the "Layers" panel. Select them both by clicking on the top photo, hold Ctrl+Shift, then select the bottom photo. Ideally these photos are already aligned since we used a tripod and didn't move it. But, sometimes small movements happen. In Photoshop, you can utilize the 'Auto-Align Layers' feature to ensure your images are correctly aligned. You can find this by selecting Auto-Align from the Edit menu. Choose the Auto mode in the pop-up dialog and hit enter. Photoshop will automatically align the images.
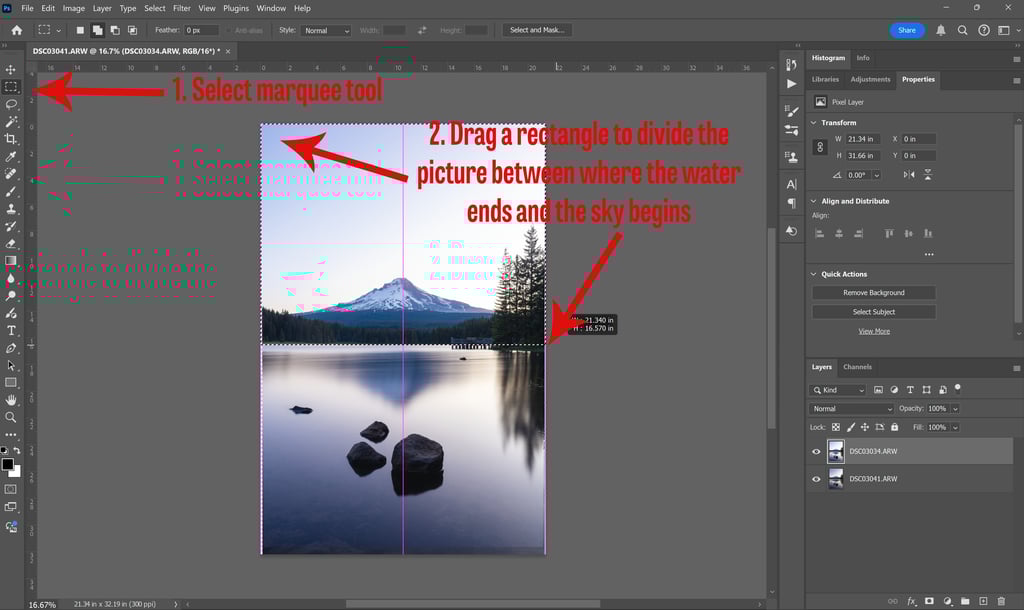
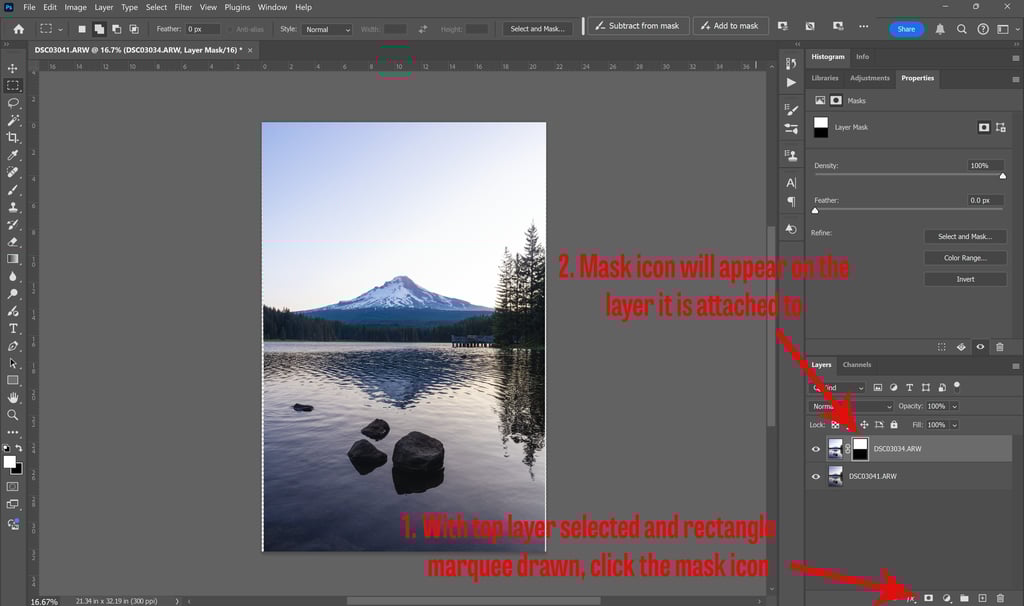
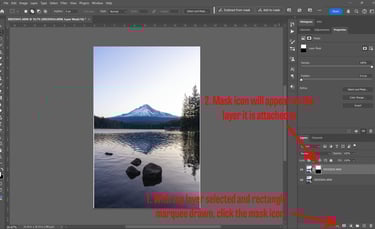
Now we will blend the two images with masking. We need to select the part of the image we want to mask. This photo is an easy example, as the horizon line at the edge of the lake is a clear demarcation between the two images for blending. I choose the rectangular marque tool, and I drag a rectangle starting from the top left corner of the photo to the right side of the photo at the horizon line. You will then see a dotted line around the top half of the photo. Then, with the top layer image selected in the Layers panel, I click the mask button icon at the bottom of the panel. You will then see a mask added to the top photo layer. The black portion of the mask will show through the layer beneath the mask; the white portion will show what is in the image attached to the mask.

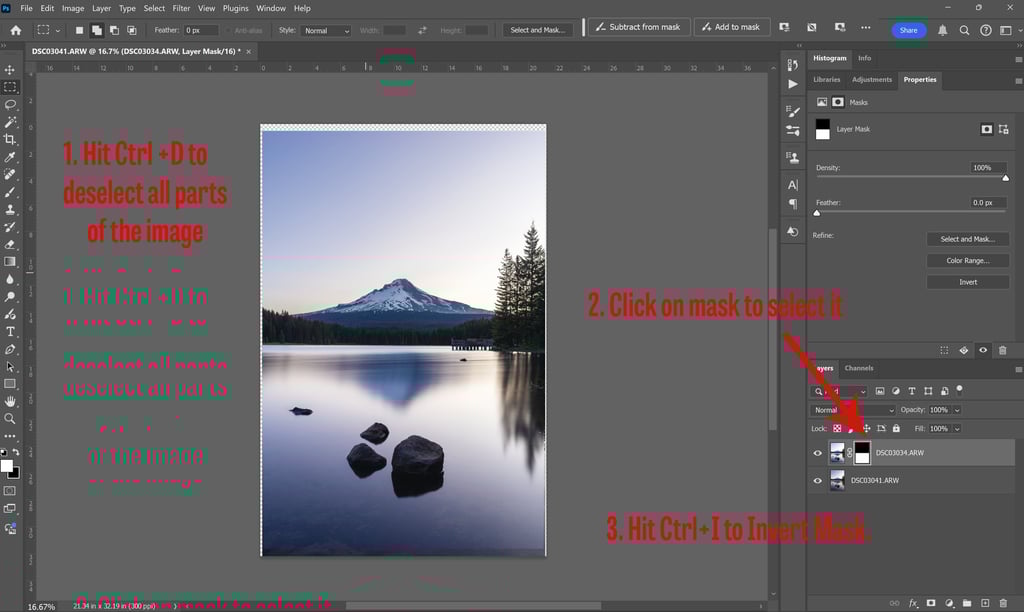
You may find that the mask is doing the opposite of what you have intended. The mask is showing the rippled water part of the short exposure image instead of the smooth water of the long exposure. To fix this, hit Ctrl+D to deselect everything; the rectangular marque dotted lines will disappear. Then, click on the mask in the layers panel. Hit Ctrl+I. This will invert the mask, making it black where it was white and vice versa.
Now Go Take Some Photos
What I love most about long exposures is the ability to create something unique while telling the story of a place. The calm, serene look of smooth as glass water compliments well the quiet moments of dawn or a tranquil moon rise. It really saved this photo of Mount Hood at Trillium Lake. I had a vision in mind of a perfect reflection. At first I was disappointed by not meeting that expectation, but in the end I'm really happy with this much more unique and artistic representation of this popular spot.

Contacts
annette@annettesjphoto.com
Socials
Copyright © 2023-2025 Annette Stiers Jones Photography. All rights reserved.