Don’t Miss the Light: Use Memory Recall to Get the Shot
Are you like me, putting this off and thinking you don't need it? I wish I'd already done this simple thing to speed up my photography!
SONY CAMERASMEMORY RECALL
Annette Stiers Jones
5/28/202510 min read
A few weeks ago, I took a great class at Glazer's Photography led by Scott Kranz. The class covered all topics related to outdoor photography. One theme I really appreciated was this: what is causing you friction in your photography? What is slowing you down? What are you struggling with? I identified a few things: I could use a new tripod, a new lens. Sure, there are always opportunities to improve gear. But I stopped to think about the simple things I could do with the equipment I already have to make the process of taking photos more seamless. One of those things is memory recall settings. Many cameras, including my Sony A7RV, have the ability to save settings to quickly convert from one configuration to another.
I had dabbled with using memory recall settings in the past. I definitely saw the benefit for wildlife. Wildlife opportunities often present themselves during landscape photography. But they are never announced or planned; you have to be ready. I had saved some wildlife settings, but I quickly forgot where I had saved them. I also hadn't thought through the full list of settings to really take advantage of what my camera could do.
Landscapes are not so fleeting as wildlife; they are not going to run or fly away in a moment. But, it takes time and mental energy to remember all those settings and make sure to change them all. There are substantial changes to be made in settings between a run & gun handheld landscape with a telephoto versus a focus stack landscape on a tripod. The landscape isn't going anywhere, but good light doesn't last forever. Given the wide variety of subjects and compositions that I shoot, I decided I really needed to set up these memory recalls to increase my probability of getting more good shots.
So, last week I took the time to really consider the settings I want to save and have ready to go, not just for wildlife, but for all my landscape shooting.
What settings should I save?
My first step was to decide what settings I used often enough to save them. My basic types of shots fall into a few groups:
Run & gun landscapes - These are handheld shots, usually with a telephoto. For this, shutter speed is priority to prevent blurry photos from movement with hand holding the lens.
Aperture priority landscapes - These shots are typically wide angle and on a tripod. I am either doing a focus stack for a large depth of field, or exposure bracketing for a bright sky and dark foreground. Aperture is a priority because I want everything in focus, and shutter speed can be what it needs to be as I'm on a tripod.
Wildlife - Shutter speed for handholding is a priority here, just like with Run & Gun landscapes. However, the subject is also moving. This requires a faster shutter speed. We can also leverage here different tools for focus, like focus area and subject recognition, to increase our odds of a good shot.
This was my list for top 3 that I want to have accessible easily. On Sony cameras like the Sony A7RV, there are 3 spaces to save memory recall to the camera dial, so this works out just right.
Sony cameras also have the ability to save 4 additional memory recalls. These need to be saved to a memory card. Be careful if you ever need to reformat the card; you will lose the settings.
I planned to save these 4 additional memory recalls to my slot 2 memory card. I chose settings that I use less frequently, but require a lot to memorize:
Milky Way: if you'd like to learn more about my typical milky way photos settings, check out this post.
Star Trails: these are similar to milky way photos, but involve taking slightly longer exposures over several hours of night time.
Moon photos: long lens shots (600 mm) of the moon. These require some specialized settings to minimize camera shake for sharp photos.
Long Exposures: this would include exposures of several minutes in bulb mode. This includes long exposures for foregrounds of milky way shots, or long exposures with ND filters to blur the motion of water or clouds.
Choose Your Settings
I'll go through how I came up with my settings for my top 3 memory recalls on the dial. Here they are for reference:
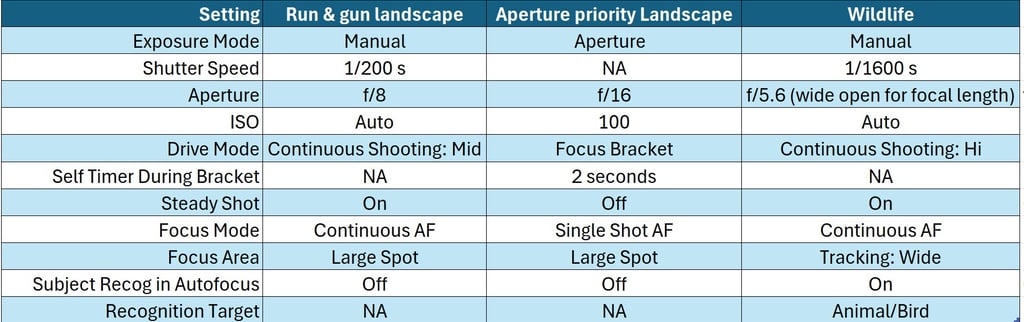
Run & gun landscapes
For shots like these, I am handholding my 70-200 mm telephoto lens. These are typically subjects that are far away. Think distant mountain peaks or buildings. There may be elements in the foreground, but it it is not important for those elements to be in focus; they are supporting elements and look nice with a bit of bokeh blur. Here are some examples:
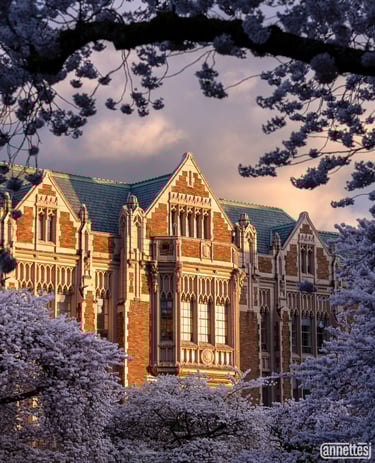
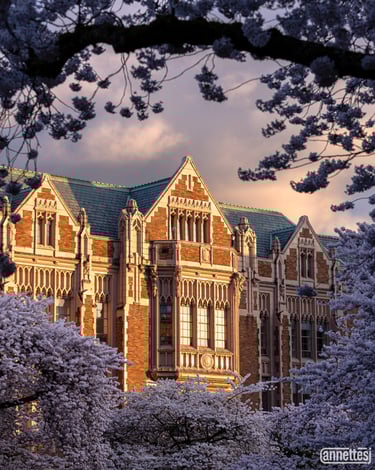
92 mm, f/8.0, 1/125 s
180 mm, f/16, 1/250 s
It's very important when hand holding to make sure the shutter speed is fast enough to eliminate motion blur. Generally, 1/(focal length) seconds is going to be enough to prevent this from happening. It will vary depending on your ability to hold the camera steady. My lens has a longest focal length of 200 mm, so I set my memory recall shutter speed at 1/200 s. This covers for the most sensitive scenario of motion blur.
For my exposure mode, I did consider using shutter priority instead of manual. I decided on manual so that I can adjust my aperture as well as shutter speed. This might be important if I want to create more bokeh or capture more of the scene in focus.
I chose f/8 as a starting point for aperture, mid-range for my lens which spans f/4-f/22. The sharpest aperture for a lens is generally in the middle of the possible apertures for the lens. Small apertures can have diffraction, and wide apertures can be soft sharpness at the corners of images.
To balance exposure quickly while I am shooting, I set the ISO to auto. This way I can adjust my shutter speed and aperture to my liking, and ISO will fall where it needs to be.
A continuous shooting drive mode is a good choice for this type of shooting. If there is any motion blur from handholding, it gives you several shots in a row to make sure you get a good one. Additionally, I turned on steady shot to help with motion blur.
I chose continuous auto focus and large spot focus area for my focus parameters. I like to be able to point to the exact spot in the image that I want to be in focus, rather than let the camera decide. I should also mention that I use back button focus by default for all of my shooting.
Aperture Priority Landscapes
Aperture priority landscapes are wide angle shots with a large depth of field required. Everything needs to be in focus, from a few feet away from the lens to far in the distance. They are on a tripod and often require focus stacking. If you'd like to learn more about focus stacking, check out this post.
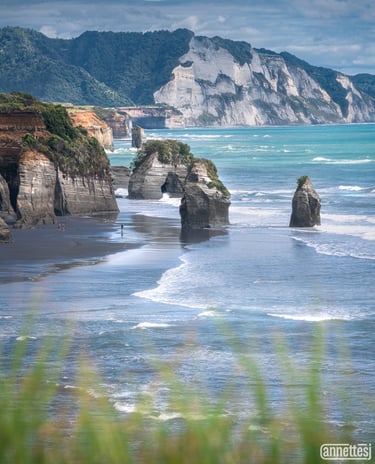
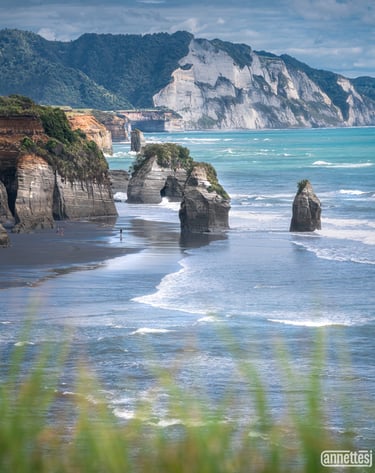
Here are some examples of what I call aperture priority landscapes:
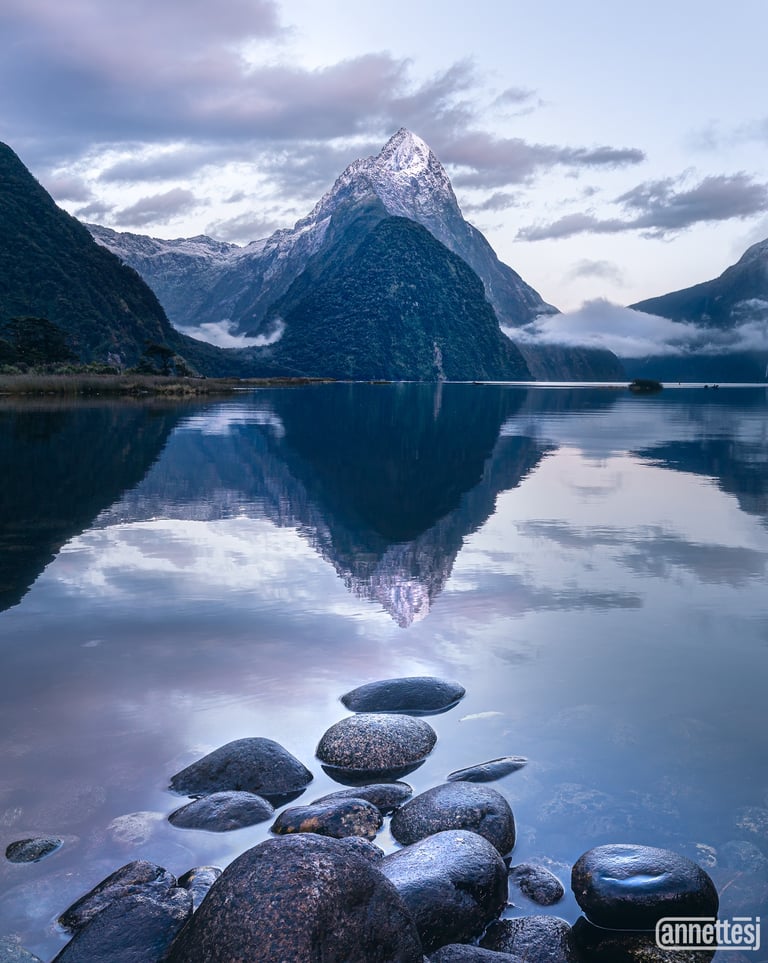
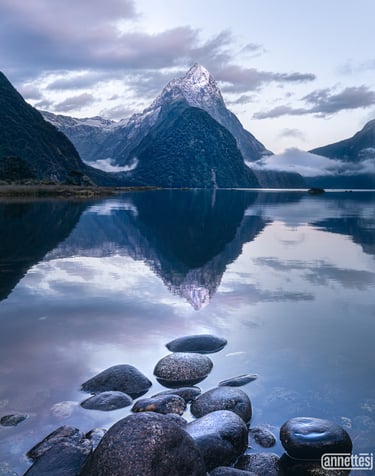
21 mm, f/11, 1/20 s
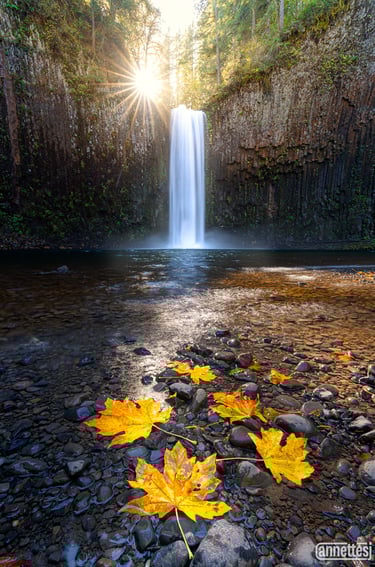

16 mm, f/11, 0.5 s
For these types of shots, I am always using a tripod. I don't care as much what the shutter speed is; it can be what it needs to be based on the aperture and ISO to balance exposure. There can be exceptions; if wind is blowing the flowers or foliage, I might what to have more control of the shutter speed. But, as a general starting point, aperture priority is my first choice with these types of shots. This means the camera will balance the shutter speed for exposure, given the chosen aperture and ISO.
I chose f/16 as a starting point for aperture; this helps ensure everything is in focus, but not so extreme that diffraction becomes an issue.
I saved ISO 100 in my settings; I like to keep it low to reduce noise. If motion of the subject becomes an issue, I would consider increasing iSO on the fly to allow for a faster shutter speed.
A cool thing about the Sony A7RV is the focus bracket drive mode. I used to have to manually move my focus point for subsequent shots, but this drive mode automates that process. In this mode, I set my focus on the nearest in part of the scene for the first image. It will then move the focus from front to back of the scene and take subsequent exposures at each focus point for you.
One additional setting I included for this memory recall is a 2 second bracket timer. This will delay the shooting for 2 seconds to prevent any vibration from depressing the shutter button, causing blur in your shot.
Wildlife
For shots like these, I am handholding a 200 mm, 400 mm, or even 600 mm telephoto lens. Movement is the biggest impediment here to a sharp image, but this time it is the subject movement that is more critical. The set up is similar to run and gun landscapes, but with some adjustments.
I again chose manual mode and auto ISO. But this time, I chose a faster shutter speed, 1/1600 s. This is enough to freeze motion of a lot of subjects, but it will depend on the creature you capturing.
Given the fast shutter speed, I chose my widest aperture for my lens, f/5.6. This lets in the most amount of light possible, and that light is needed since the shutter speed is so short. The consequence is that we will have a shallow depth of field, but often this bokeh is wanted in wildlife scenarios to make the subject stand out.
I again choose a continuous shooting drive mode. The animal is constantly moving, and is not posing for you. You never know when it will look towards you or fly into motion. Continuous shooting gives you several shots in a row to make sure you get a good one. Additionally, I turned on steady shot to help with motion blur.
One big change in settings here is to turn on a feature of my Sony A7RV: AI subject recognition in autofocus. You can set your subject target to human, animal, bird, plane, and more. This is a big advantage and something I wanted to make sure to use.
For my focus area, I chose Tracking: Wide. I chose this as opposed to my usual spot focus because I found it difficult to correctly target the moving animal using a small spot. This means the camera is doing more of the deciding what to use as focus point.
How to Program Memory Recall Settings on your Sony A7RV
Dial Settings 1-3
The first step is to get your camera set up with the settings you want to save. So adjust your shutter speed, aperture, ISO, drive modes, etc. as you would like to have them.
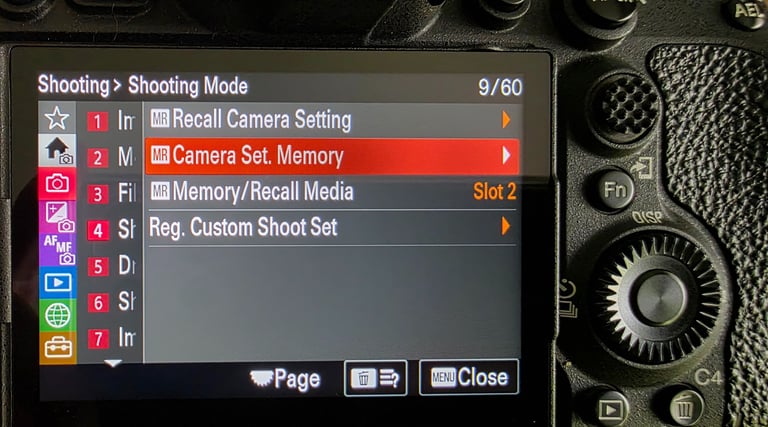
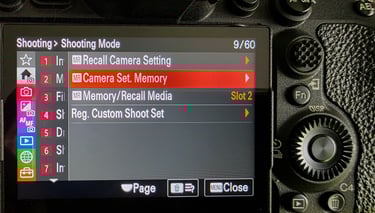
Once you have done that, click the menu button on the back of your camera. Go to the red camera icon and select 4: Shooting Mode using the dial to navigate and center button of the dial to select.


Next select Camera Set. Memory from the list of options:
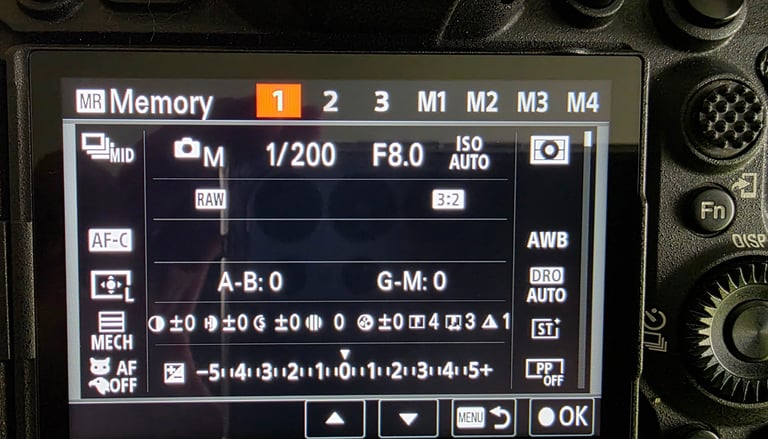
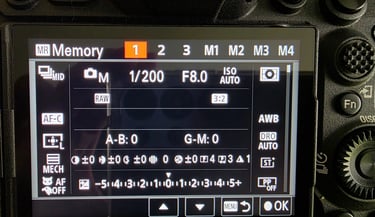
Then a screen will pop up showing on the first page the most common settings. You can press up and down on the dial to navigate through the full list of settings. Pressing left and right on the dial will change which spot on your dial you are saving to. The selected position will be highlighted at the top of the screen.
To register the settings to your selected slot, just click the center button of the dial. You'll see this screen when it's successfully registered.

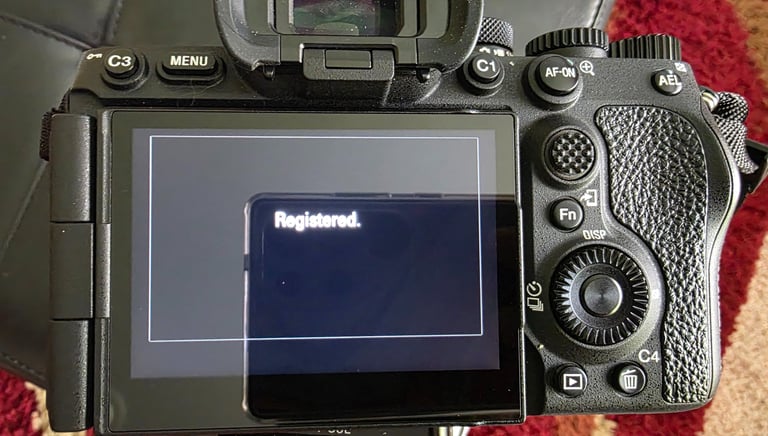
That's it! Now, you can use the dial on top of the camera to load your saved settings by selecting 1, 2, or 3 on the dial.
Saving settings to memory card on M1 through M4 is done much the same way. You will want to specify in the same Shooting Mode menu where you want to save your Memory/Recall Media. I set mine to save to Slot 2 memory card, as all my RAW files save to Slot 1. Then I can just leave this card in Slot 2 all the time, and not worry I've left the card somewhere after I downloaded my photos.
How do I remember where I saved which settings?
This was one of my primary barriers to using saved settings before. I felt I was better able to remember and dial in settings then to where I had save them.
My trick for this is to use an acronym. I have saved to dial 1, 2, 3, in this order:
Run & gun landscapes
Aperture priority landscapes
Wildlife
If I just keep in mind the acronym RAW, I can remember what I have saved to each position. I always shoot RAW files, so this is easy for me to remember.
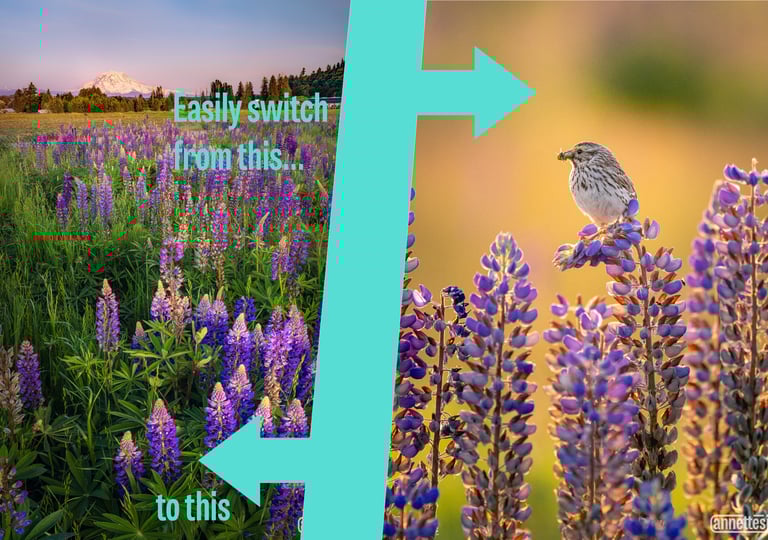
Putting it into practice
I tried using these settings last weekend, and they were extremely helpful in moving between different types of photos efficiently. When I first arrived at the lupine fields, there were birds amongst the flowers. I popped on my telephoto lens and started firing away very quickly by switching my dial to spot 3 with my wildlife settings.
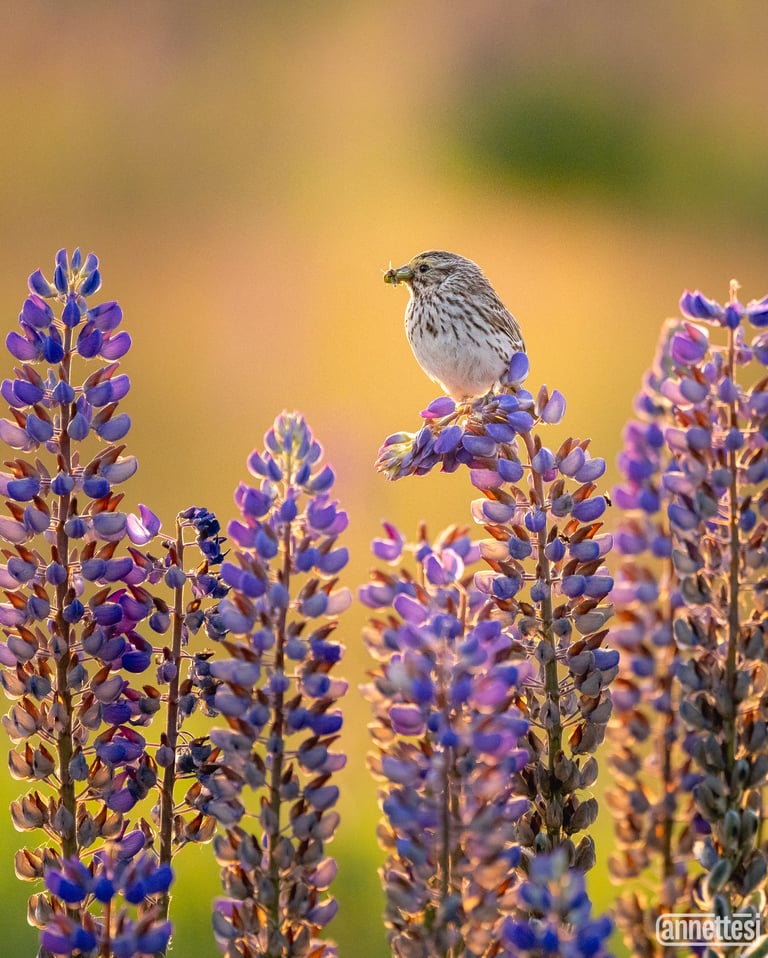
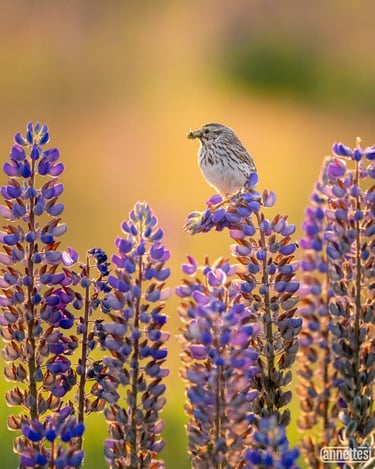
391 mm, f/5.6, 1/1600 s, ISO 4000
Next I went to my planned shot from a spot I remembered from previous years, an angle where you can get the lupine field in the foreground with Mount Rainier in the background. I put on my wide angle lens, set up my camera on my tripod, and switched to dial setting 2 to bring up my aperture priority landscape settings. Luckily there was not much wind at all at the time, so I only needed to make a small adjustment to ISO 400 in order to get a slightly faster shutter speed.
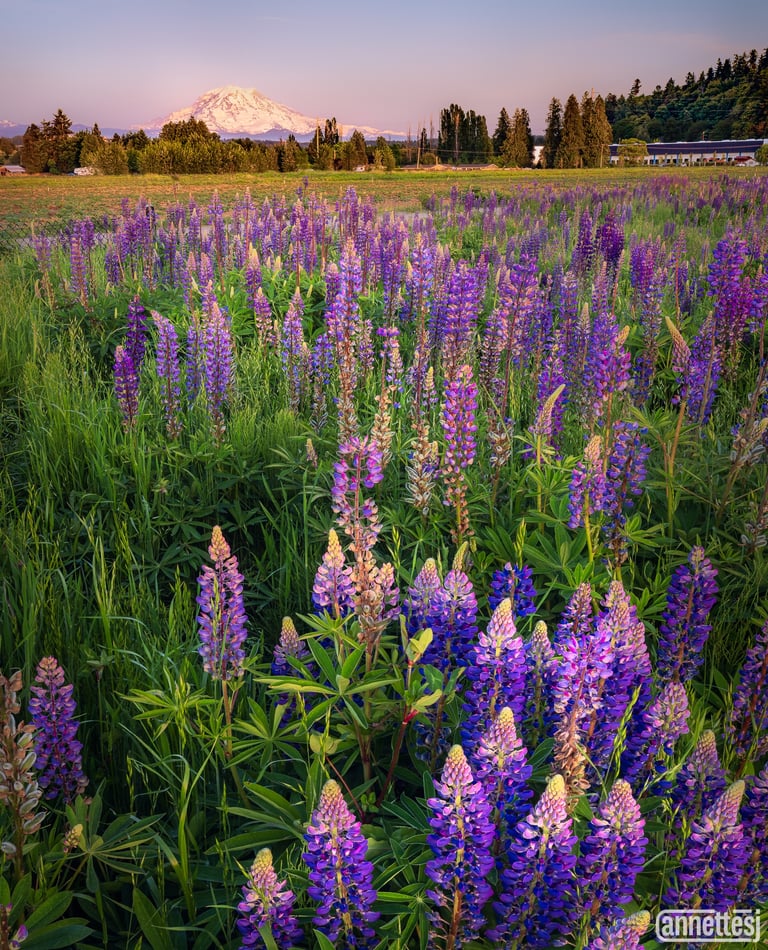
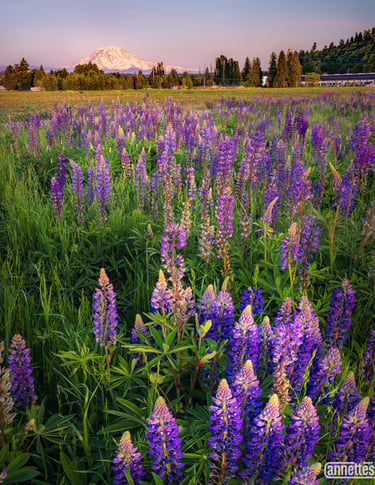
29 mm, f/16, 1/3 s, ISO 400
I really enjoyed using these new saved settings. It made my shooting faster, more stress free, and more enjoyable overall. Having those wildlife settings saved helped me get those shots of the birds successfully. And, saving my aperture priority landscape settings helped me make all the changes necessary for wide angle shots without having to remember every single thing that needed to be changed. I wish I'd done this a long time ago!
Contacts
annette@annettesjphoto.com
Socials
Copyright © 2023-2025 Annette Stiers Jones Photography. All rights reserved.